Wireless M-Bus to NB-IoT - MQTT
Integration manual for the ACRIOS Systems converters ACR-CV-101NI-W-D2 and ACR-CV-101NI-W433-D2 for Wireless M-Bus smart meters readout and data transmission to the MQTT broker via NB-IoT network.
MQTT is supported on firmware version 2.14.2 and higher.
Introduction
MQTT (Message Queuing Telemetry Transport) is a lightweight messaging protocol for small sensors and mobile devices optimized for high-latency or unreliable networks. MQTT is a publish/subscribe messaging protocol that works on top of the TCP/IP protocol.
This article covers the following topics:
- Script principle
- MQTT protocol
- MQTT broker setup
- Lua script - the configuration
- Configuration messages
This manual describes a use of the MQTT Lua script with HiveMQ brokers.
Script Principle
Communication diagram
Key Functionalities
- The converter listens to the meter transmissions during a configured time period and creates a table of known meters to prevent multiple instances of sending the same meter payload.
- The converter captures the payloads and publishes them to the MQTT broker.
- The converter plans automatic readouts based on the configuration.
- The converter starts gathering data at a specified time, which can be delayed based on a time spread parameter. This function allows the reduction of peak load on the broker by time spreading the publication of the data.
- Additionally, the converter periodically publishes a "beacon" message, which is a short message that indicates the device is operational and connected to the network. After publishing the beacon message, the device checks for any configuration changes or actions to execute.
The converter can listen to and read data from meters operating in wireless T and C modes simultaneously.
Boot-up and scheduled actions diagram
The system starts by booting up and determining the initial wake-up reason, specified by the nextWR script parameter in the script, which could be for either beacon reporting or data gathering. It then performs the corresponding task and goes to sleep until the next scheduled wake-up.
Upon waking up, the system updates the wake-up reason, schedules the next wake-up time based on the upcoming beacon or gather times, and repeats the process accordingly.
Pressing the button on the device will wake it up and send a beacon report immediately, regardless of the scheduled wake-up time. Note, that this doesn't affect the scheduled wake-up time, which will still occur as planned.
Communication with a broker diagram
The device periodically publishes a beacon message to the MQTT broker to indicate that it is operational and connected to the network. The beacon message is a short message that contains the device's status and information.
After the beacon is published, the device subscribes to the acrios/<IMSI>/up/# topic to receive configuration and actions messages.
The device clears acrios/<IMSI>/up/config message after applying the changes and publishes the changed parameters to the acrios/<IMSI>/config topic.
The device executes the actions from the acrios/<IMSI>/up/action topic. Actions can be scheduled to execute every time the device publishes the beacon message.
MQTT protocol
MQTT is a M2M/IoT connectivity protocol. It was designed as an extremely lightweight publish/subscribe messaging transport. It is useful for connections with remote locations where a small code footprint is required or network bandwidth is limited. The protocol allows devices to communicate with minimal overhead and low bandwidth.
MQTT broker
An MQTT broker is a server that receives all messages from the clients and then routes the messages to the appropriate destination clients. The broker is responsible for receiving all messages, filtering the messages, deciding who is interested in them, and then publishing the message to all subscribed clients.
MQTT client
An MQTT client is any device that runs an MQTT library and connects to an MQTT broker over a network. The client can be a publisher, a subscriber, or both. We are using MQTT Explorer as an MQTT client for demonstration purposes.
Public Eclipse Mosquitto MQTT broker
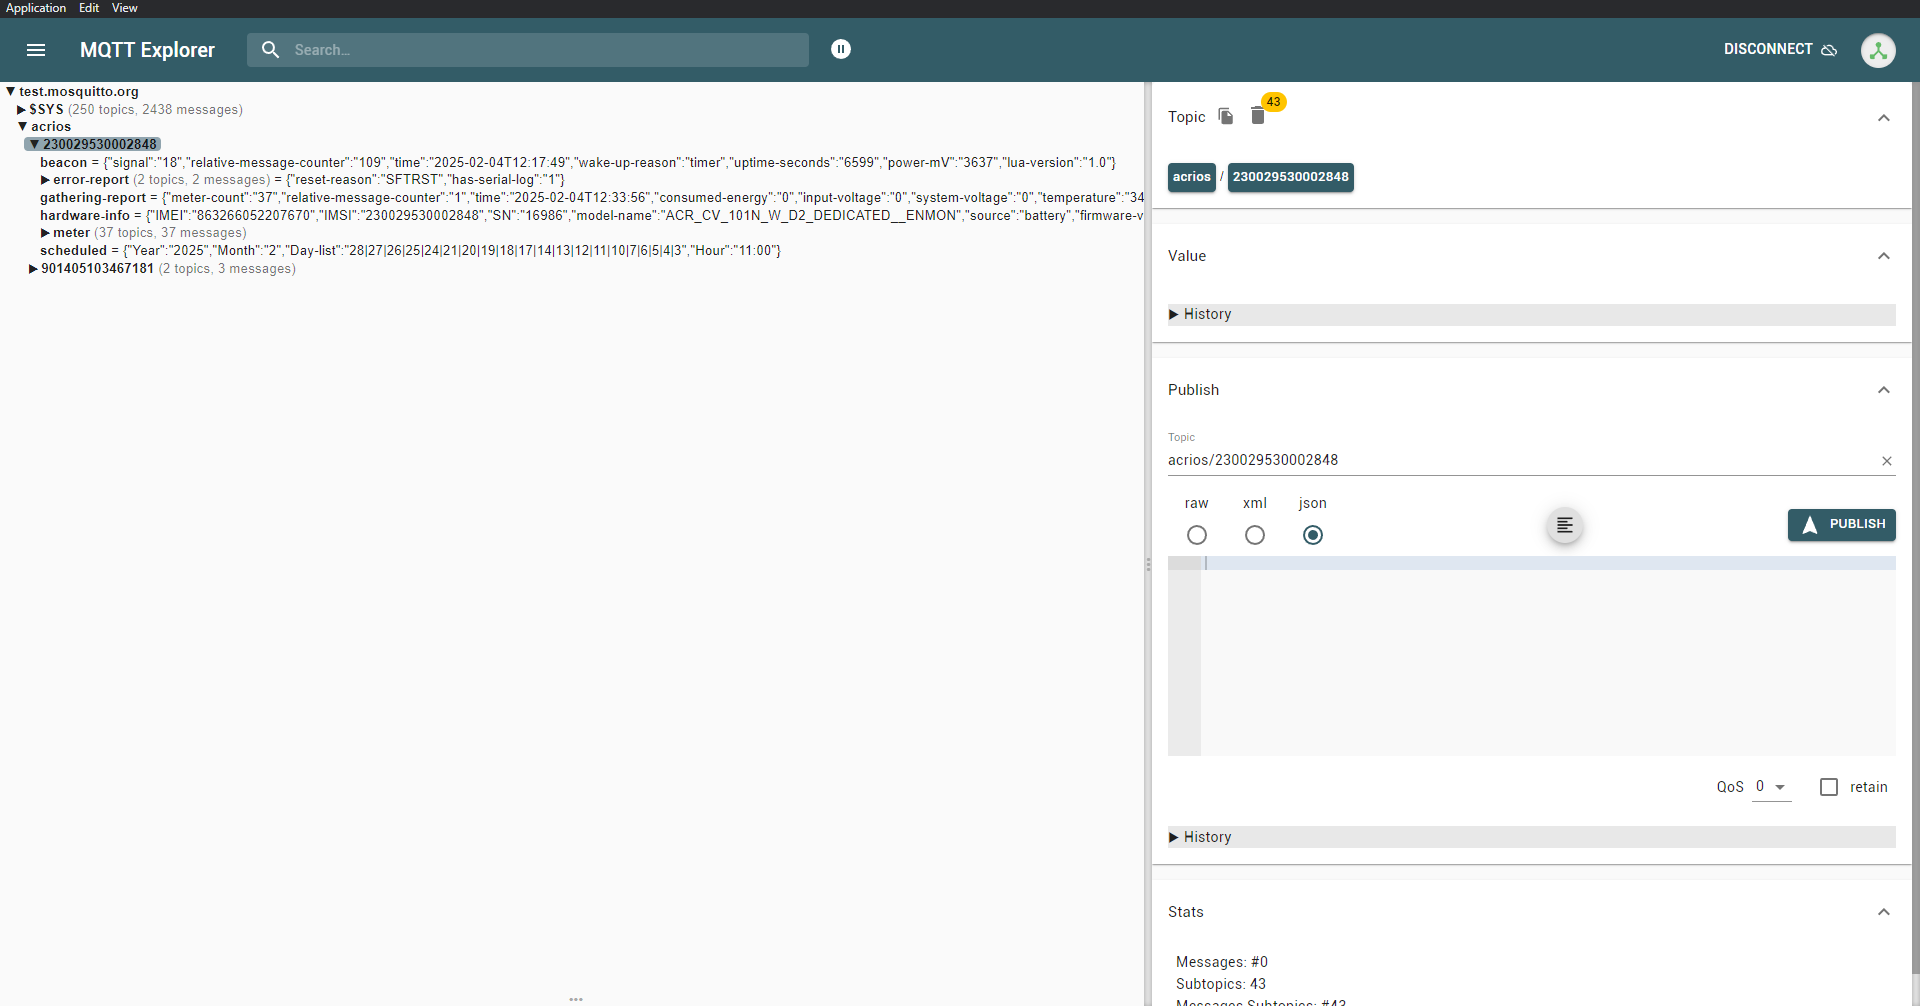
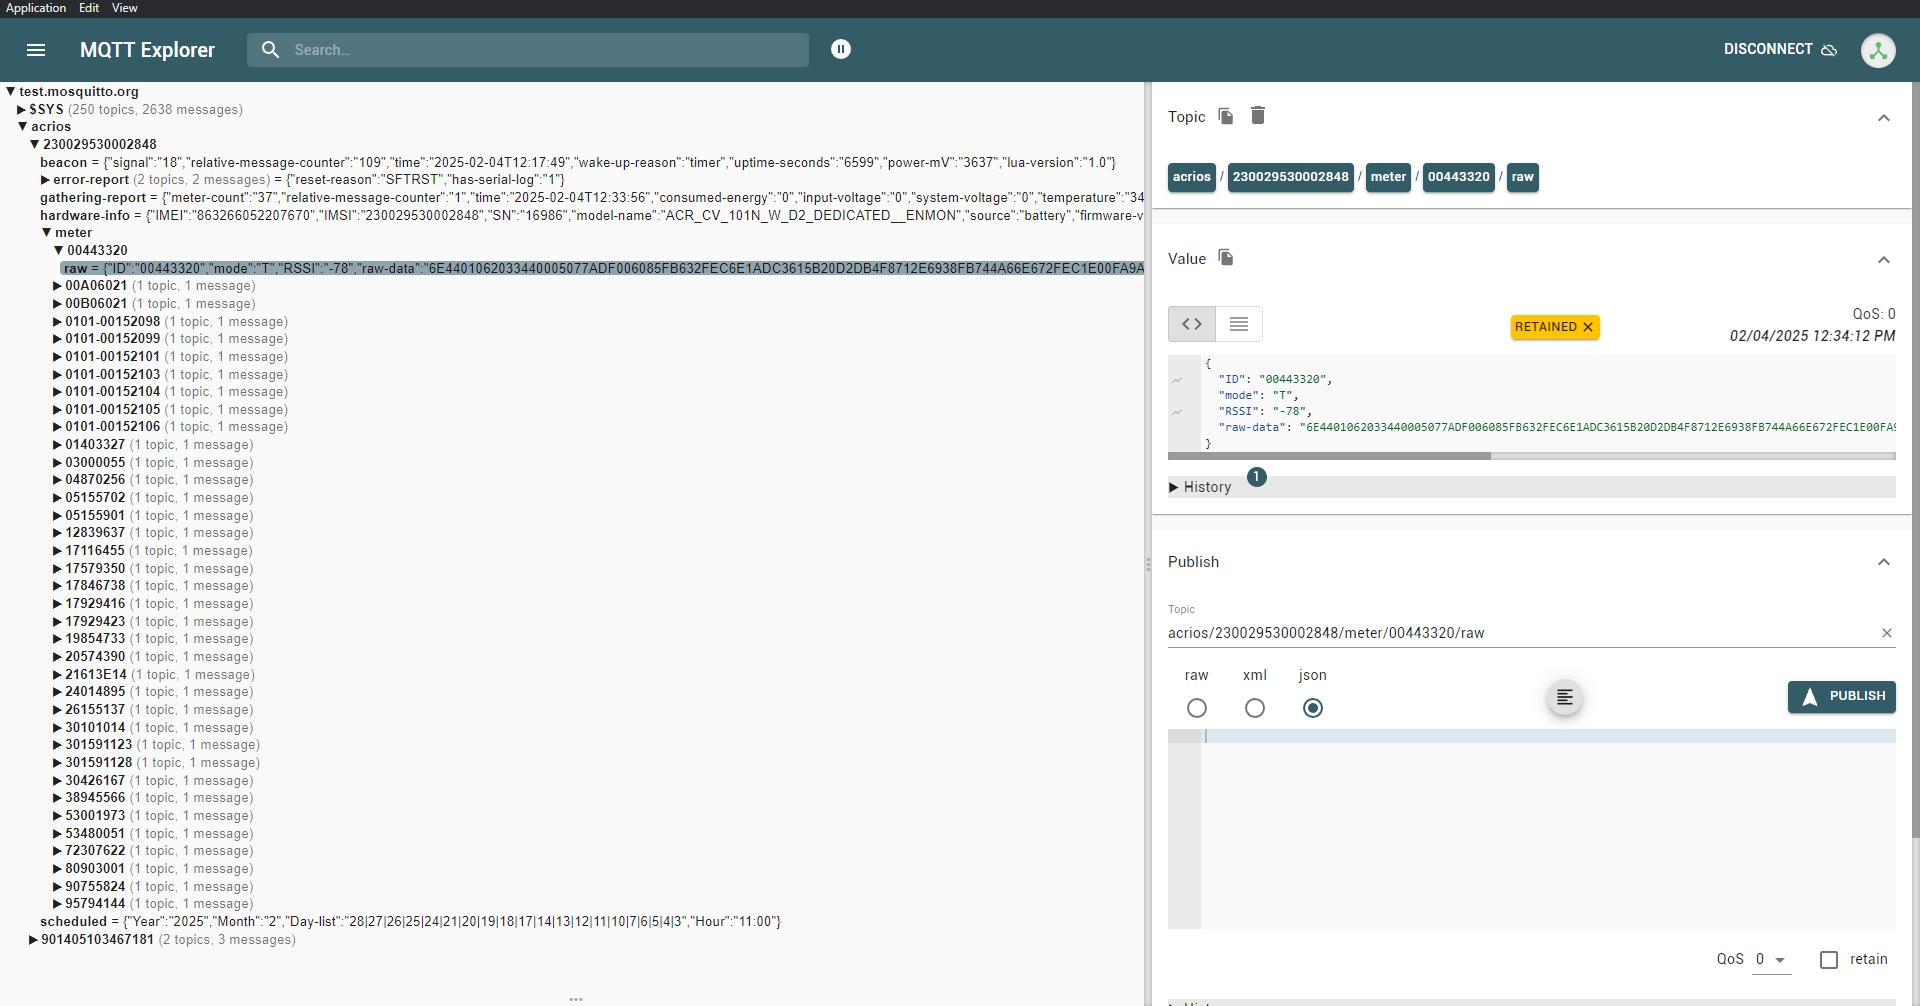
Eclipse Mosquitto is a public MQTT broker that can be used for testing and development purposes. The broker is available at test.mosquitto.org. You can check messages from our testing devices by subscribing to the topic acrios/#.
-
Open MQTT Explorer and click on the + button to create a new connection.
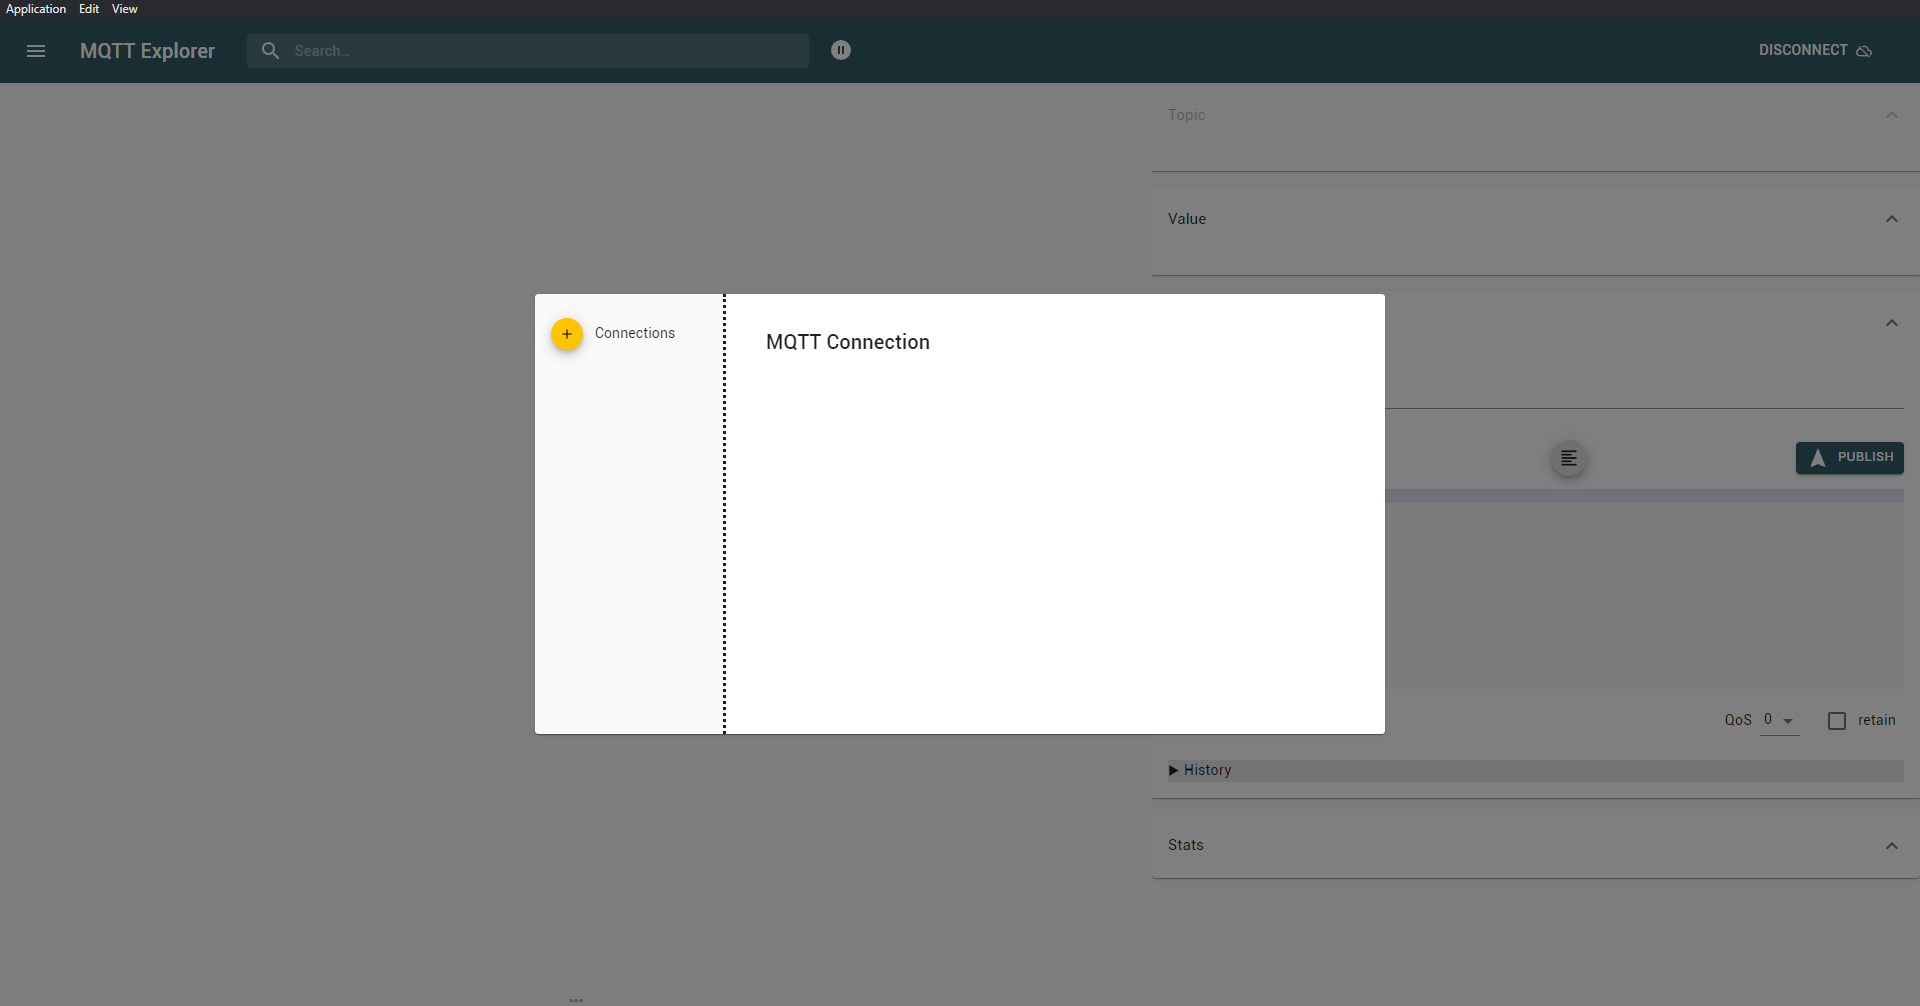
-
Fill in the connection details and click on the Advanced button.
- Host:
test.mosquitto.org - Port:
1883
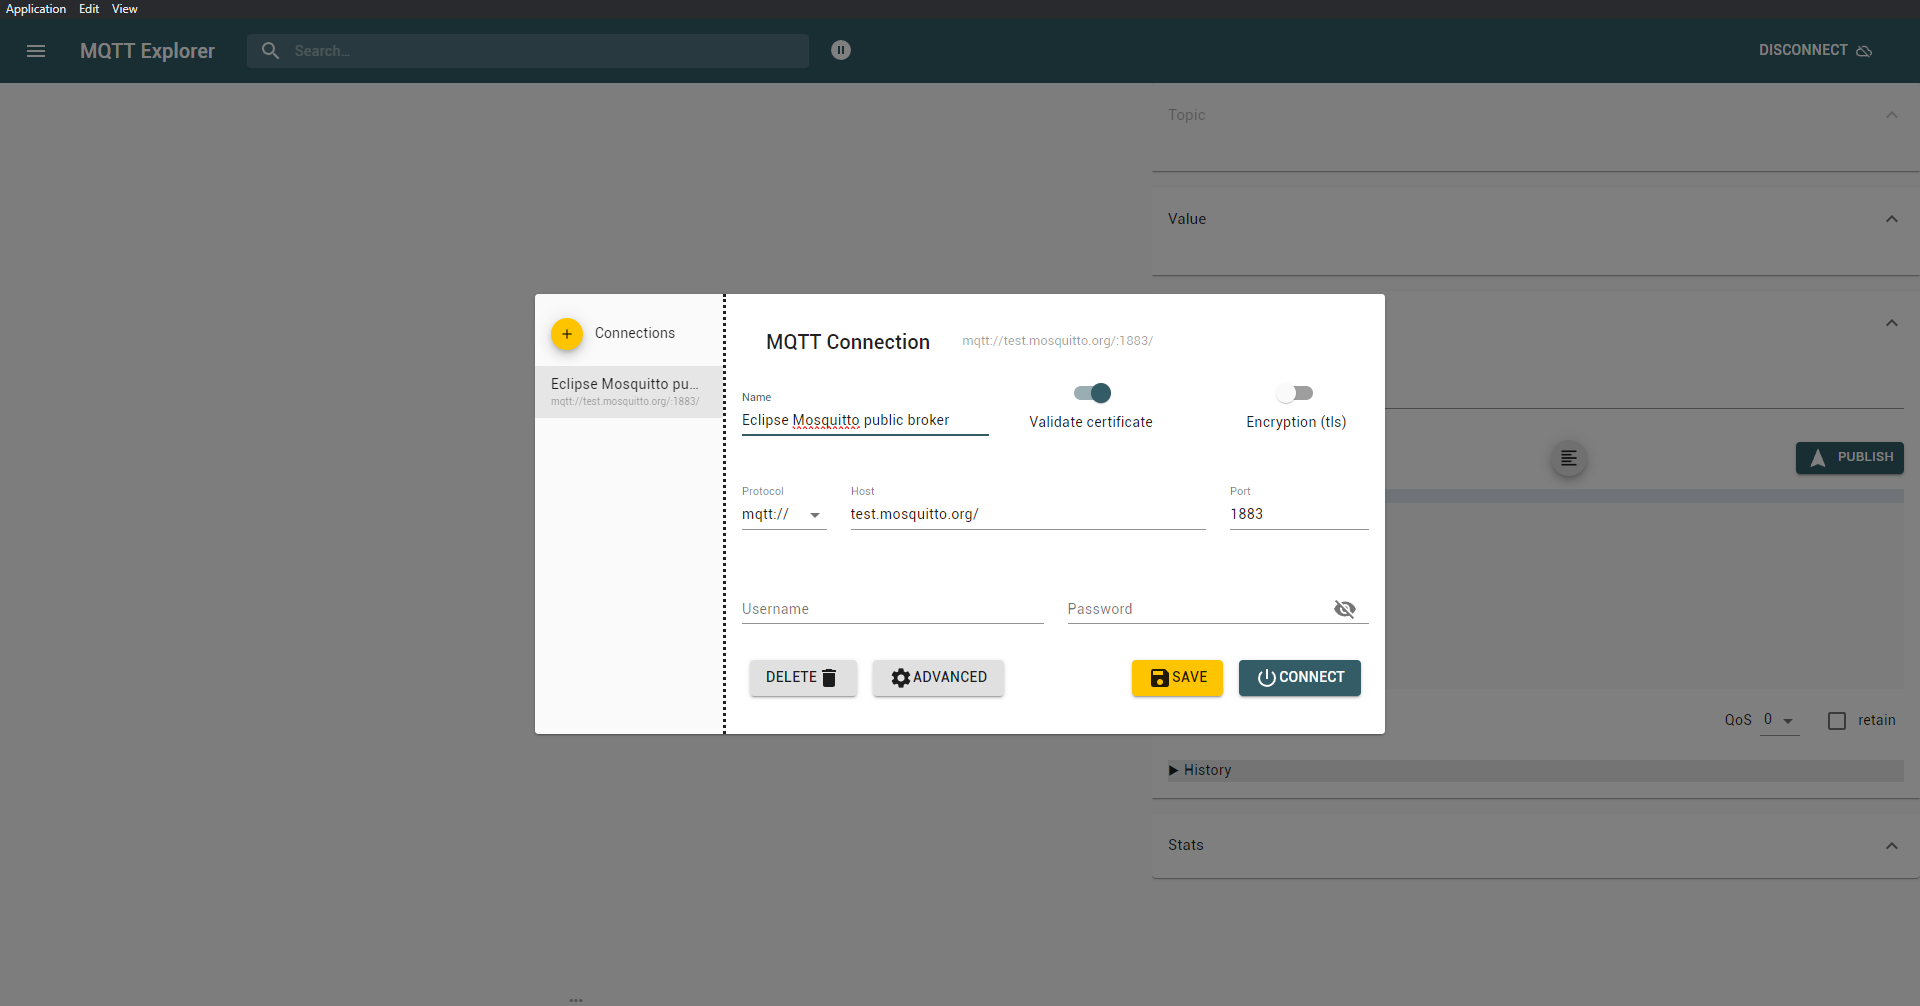
- Host:
-
Fill in
acrios/#topic and click on the Add button.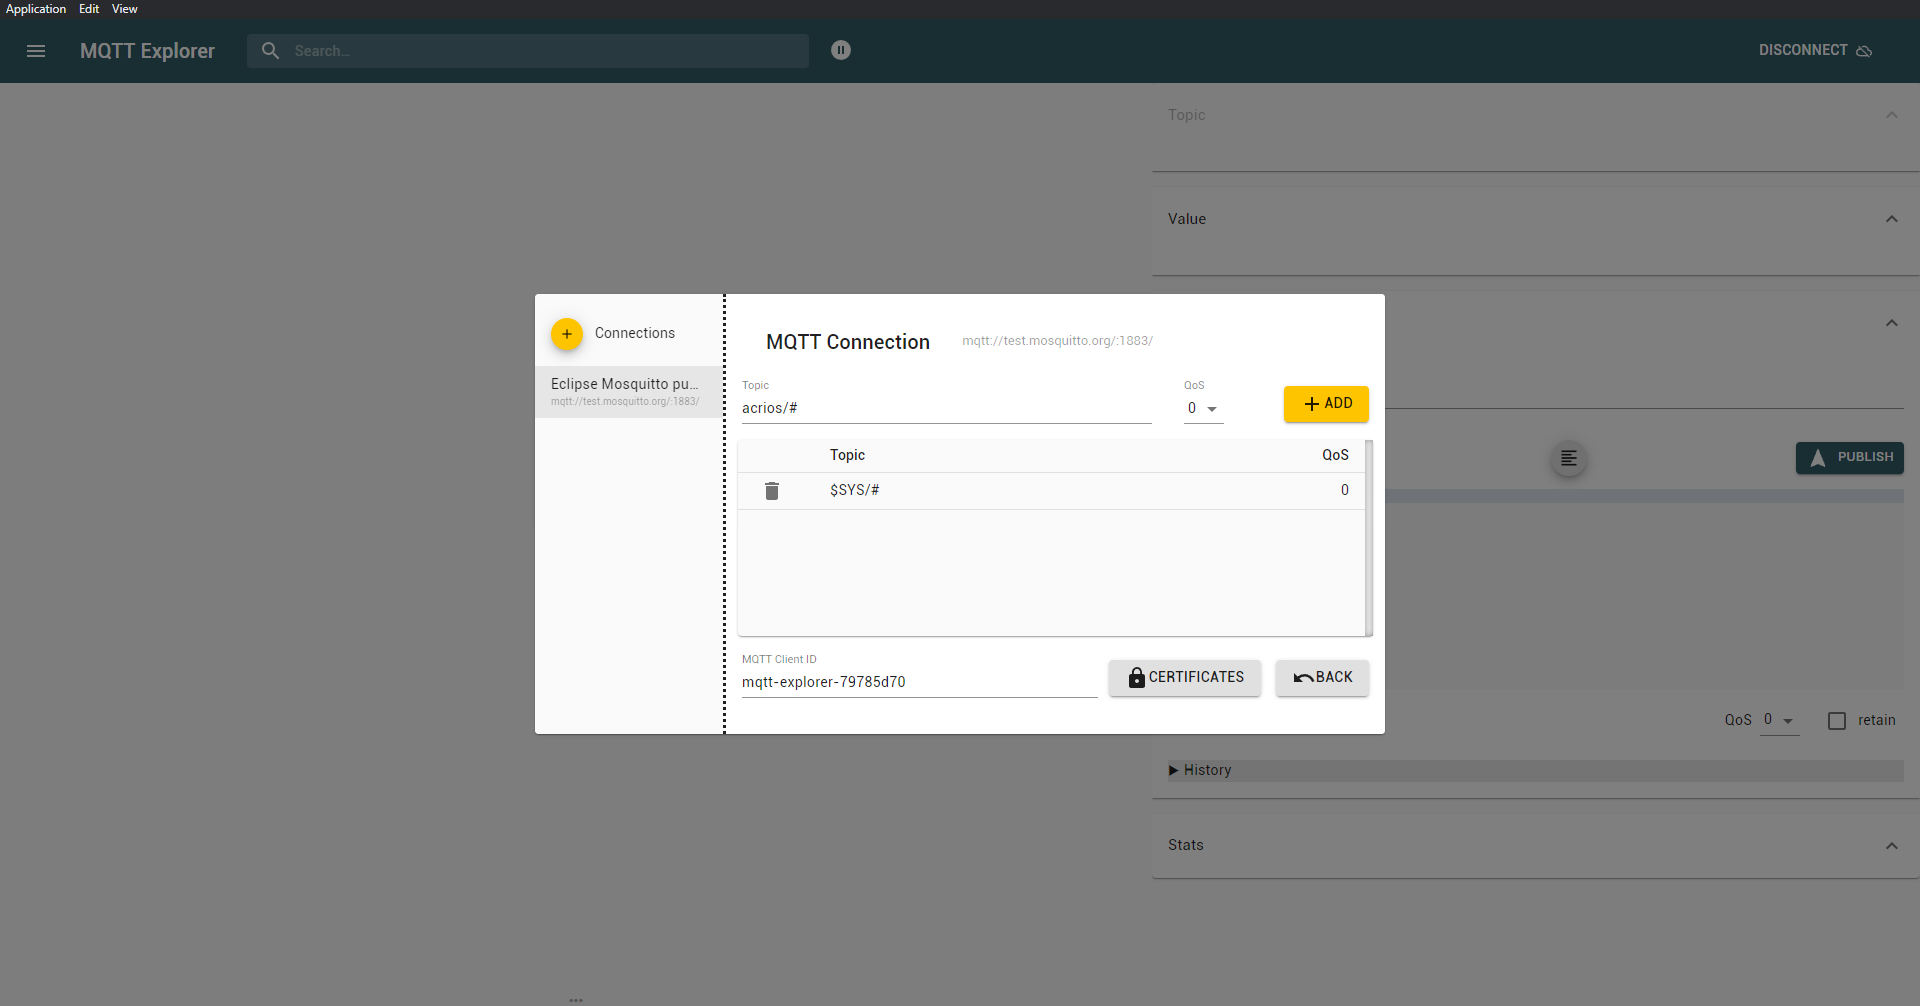
-
Click on the Back button and then on the Connect button.
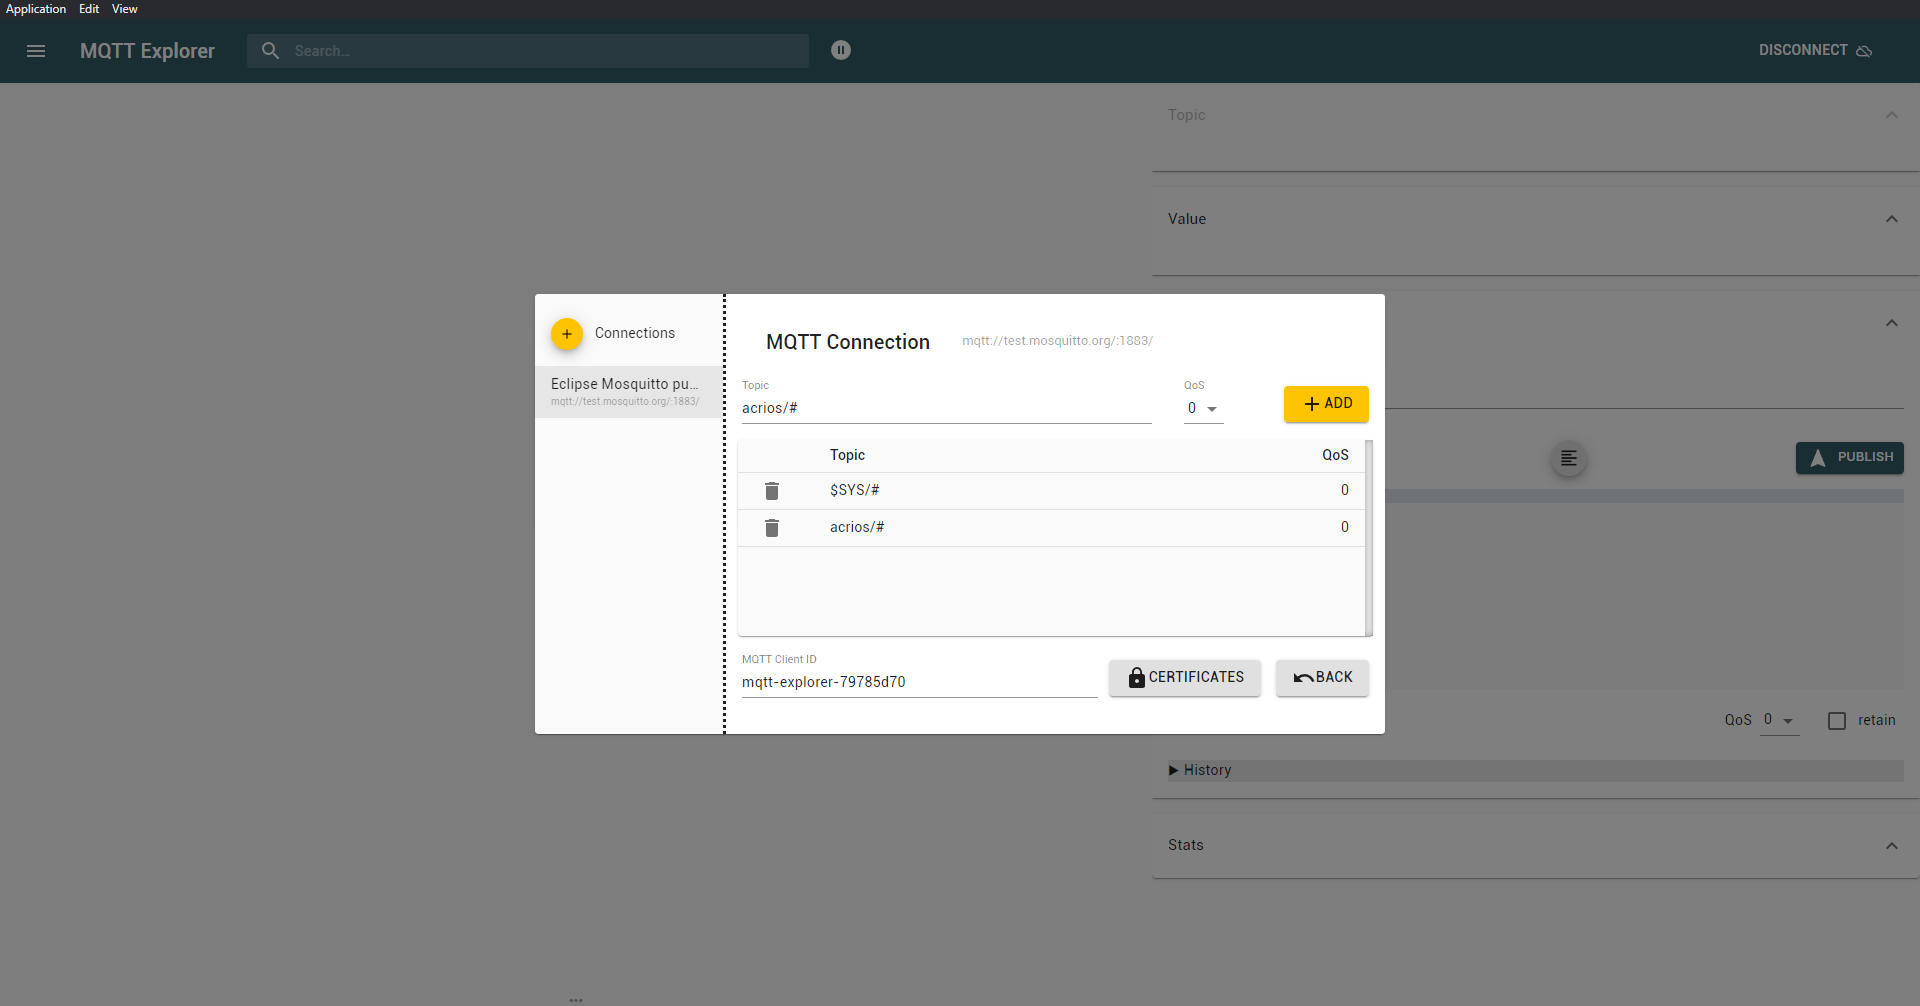
-
If the connection is successful, the client will show subscribed topics and received messages.
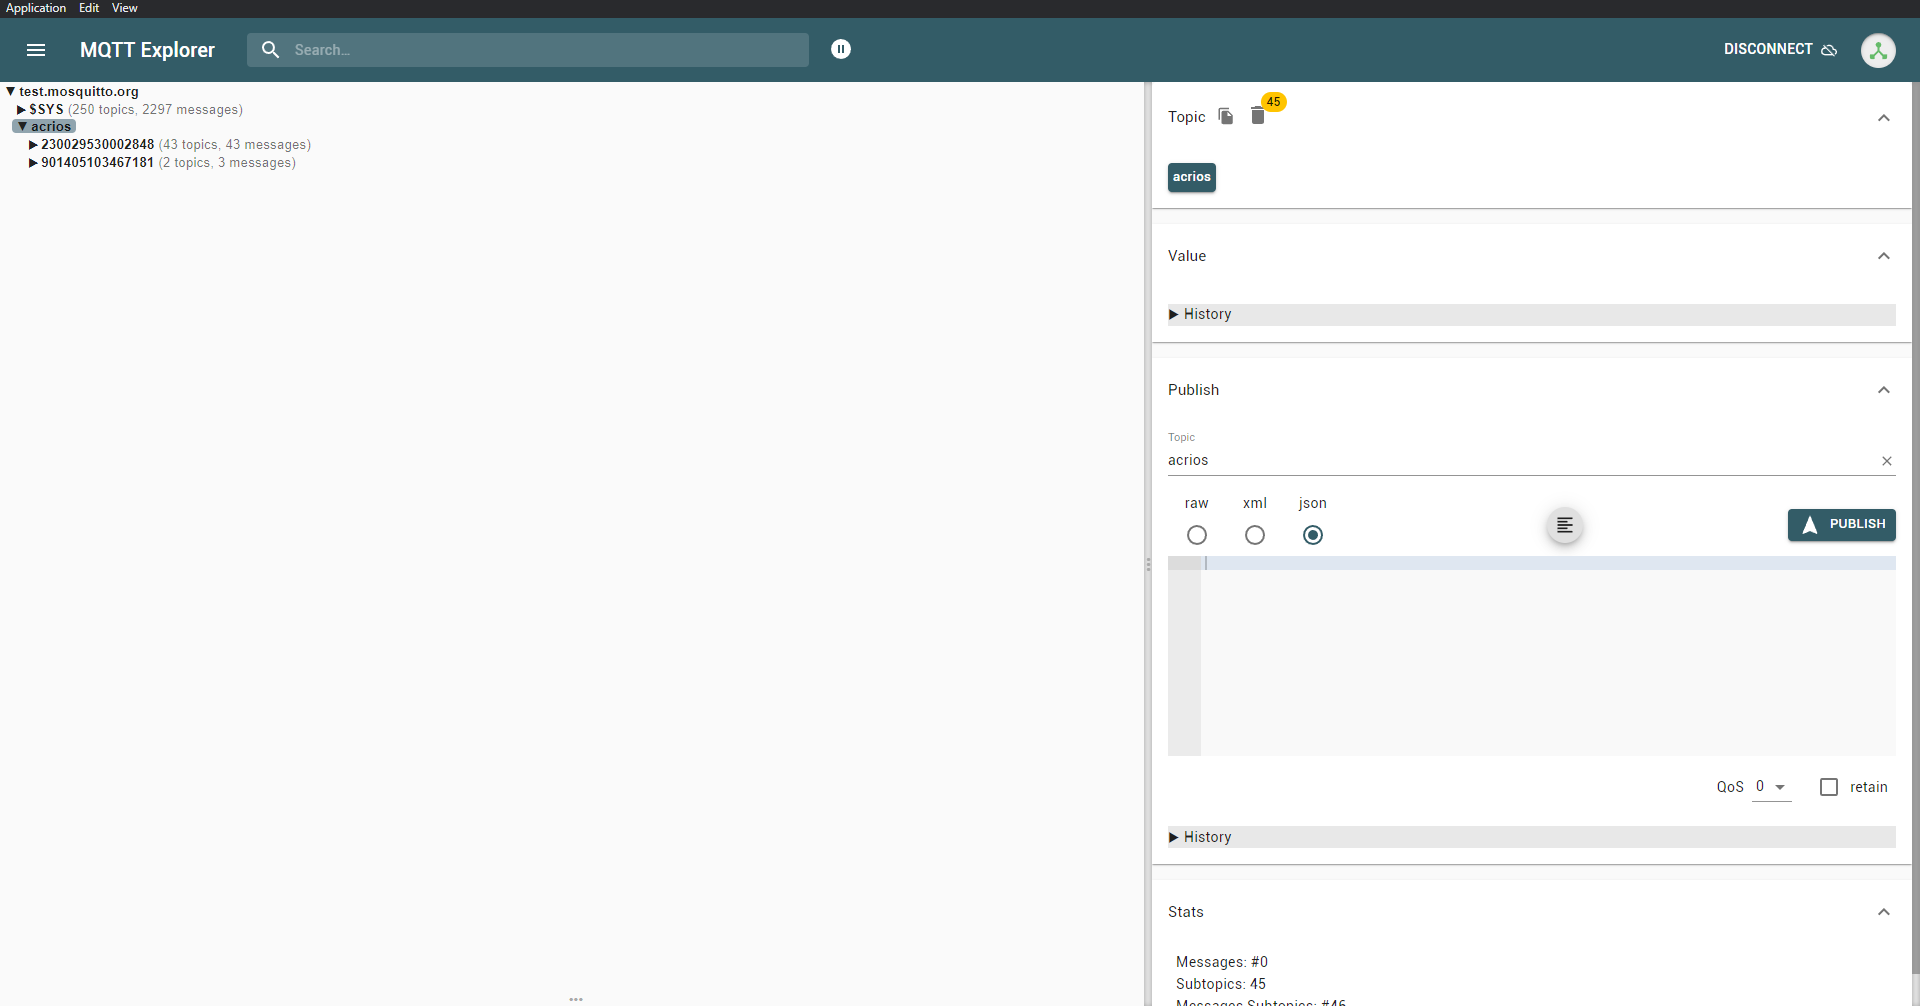
-
You can now observe the messages from the devices on the broker.
The test.mosquitto.org is a public broker. This means that any data you publish or subscribe to is accessible by anyone connected to the broker. It is not recommended to use this for sensitive or confidential data, as there is no privacy or security guarantee. For production systems, consider using a secure and private MQTT broker.
Proceed with caution and ensure you are only testing or sharing non-sensitive information.
Script Parameters
The Lua script contains a set of parameters that define the behavior of the device. The parameters can be modified to adjust the device's behavior to your requirements.
-- denotes a comment in the script.
ver="1.7"
----- CONFIGURATION -----
-------- NB-IoT ---------
APN = "auto"  -- APN for the SIM card
PLMNID = 0  -- PLMNID for the SIM card
reinitOnWakeGather = 1  -- 1 for reinitialization of the NB Iot module before gathering
--------- MQTT ---------
mqtt_server = "test.mosquitto.org"  -- broker
mqtt_user_base = "acrcv-"  -- client name template
mqtt_client_name = nil  -- client name - set to some value, otherwise will be mqtt_user_base .. imsi
mqtt_topic_base = "acrios/"  -- topic template, will add IMSI/ .. topic name
mqtt_user = ""  -- user name (for login)
mqtt_password = ""  -- password (for login)
mqtt_port = 1883  -- port (8883 using TLS/SSL)
mqtt_mode = "auto" -- "TCP" or "SSL" or autodetection based on port (8883 for SSL, else TCP)
mqtt_timeout = 20000  -- timeout used for connecting and waiting for subscription
reportScheduled = true  -- true for reporting settings to the MQTT. List of days on which gathering occurs
willMessage = false  -- true to enable MQTT disconnect message
atDebug = false  -- true for debugging AT commands
------- Filtering -------
allowedDevTypes = {}  -- empty means no filter
allowedManIDs = {}
allowedIDs = {}
sontexIDs = {}  -- example : {"27632659", "28725033", "27718226"}
sontexIDsFreqOffs = {}
------- Start-up --------
nextWR = 0  -- 1 for starting with gathering, 0 for starting with beacon
-------  Gathering timming  -------
-- scheduled --
workdayOnly = 1  -- true for workdays only, false for all days
numberOfDays = 31  -- number of days/workdays since end of month
startHour = 11  -- hour of start of the readout
randomizeSeconds = 7200  -- up to 7200s~2hrs of delayed start since startHour
-- periodic --
pDays = 0  -- period of days for gathering data
pHrs = 1  -- period of hours for gathering data
pMins = 0  -- period of minutes for gathering data
---- Mode switching -----
mtbl = {
	S1 = 120,  -- S1 mode
	T1 = 120,  -- T1/C1 mode
	M =  120,  -- Metra mode
	--SENSUS434 = 0,  -- Sensus T1 433 MHz
	--BUP433 = 0,  -- Bubble-up 433 MHzW
	--BUP868 = 0  -- Bubble-up 868MHz
}
------- Timeouts --------
spe = 1  -- *10minutes time per device timeout
ift = 10  -- interframe timeout in minutes
beaconT = 12*4  -- sending beacon interval (12*4*15min = 12h)
--------- Other ---------
noComWdg = 20*24*3600*1000  -- no communication watchdog - resets the device if no communication is received in the specified time (20 days in milliseconds)
SCmV = 3150  -- minimum mV on SC before sending/publishing the message
--- CONFIGURATION END ---
Modifying the Script for Private MQTT Broker
To use the script with a private MQTT broker, you need to modify the following parameters:
mqtt_server- Cluster URL from the HiveMQ Cloud.mqtt_user- Username from the HiveMQ Cloud.mqtt_password- Password from the HiveMQ Cloud.
...
--------- MQTT ---------
mqtt_server =  "testvps.acrios.com"  -- broker
mqtt_user_base = "acrcv-"  -- client name template
mqtt_client_name = nil  -- client name - set to some value, otherwise will be mqtt_user_base .. imsi
mqtt_topic_base = "acrios/"  -- topic template, will add IMSI/ .. topic name
mqtt_user =  "user"  -- user name (for login)
mqtt_password = "password"  -- password (for login)
mqtt_port = 8884  -- port (8883 using TLS/SSL) | custom port
mqtt_mode = "auto" -- "TCP" or "SSL" or autodetection based on port (8883 for SSL, else TCP)
mqtt_timeout = 20000  -- timeout used for connecting and waiting for subscription
reportScheduled = true  -- true for reporting settings to the MQTT. List of days on which gathering occurs
willMessage = false  -- true to enable MQTT disconnect message
atDebug = false  -- true for debugging AT commands
...
Example with the parameters from the private Mosquitto Broker that we have created.
After modifying the parameters, write the script to the device. In case you look for how to write the script to the device, please refer to the GUI manual.
After writing the script to the device, the device will connect to the MQTT broker and start sending messages.
Modifying the Script for Different SIM Card Providers
If you wish to use a SIM card coming from a different provider than Miotiq, modify the script accordingly:
A. Set these parameters to the values provided by your SIM card provider.
...
APN = "cdp.iot.t-mobile.nl" -- change this to the APN of your SIM card provider (this is an example for T-Mobile NL)
PLMNID = 20416 -- change this to the PLMNID of your SIM card provider (this is an example for T-Mobile NL)
...
B. Or set the values as following for the automatic selection.
...
APN = "auto"
PLMNID = 0
...
The automatic selection has to be supported by the SIM card provider.
Gathering
Gathering is the process of collecting data from the meters. The script allows you to configure the gathering process in this ways:
- Scheduled gathering - gathering data at a specified time.
- Periodic gathering - gathering data at regular intervals.
- Scheduled and periodic gathering - combining both scheduled and periodic gathering.
Scheduled gathering
The scheduled gathering process is scheduled to start at a specified time - startHour, which can be delayed by a random time spread parameter - randomizeSeconds. The gathering process can be set to work only on workdays or all days - workdayOnly and on a specified number of days from the end of the month - numberOfDays.
...
-- Scheduled gathering --
workdayOnly = 1  -- true for workdays only, false for all days
numberOfDays = 3  -- number of days/workdays since end of month
startHour = 10  -- hour of start of the readout
randomizeSeconds = 7200  -- up to 7200s~2hrs of delayed start since startHour
-- Periodic gathering ---
pDays = 31  -- period of days for sending data
pHrs = 0  -- period of hours for sending data
pMins = 0  -- period of minutes for sending data
...
------- Timeouts --------
beaconT = 12*4  -- sending beacon interval (12*4*15min = 12h)
...
If you want to only use the scheduled gathering process, set the pDays parameter to 31 and other periodic parameters to 0.
Timing diagram of the scheduled gathering process - day
You can observe that the beacon is sent periodically, which corresponds to the beaconT parameter, indicating a 12-hour interval for sending beacons. Additionally, the gathering process uses a spread function and starts later than the set time, as defined by startHour and randomizeSeconds, allowing for up to a 2-hour delay in the start time. This configuration ensures that the system sends beacon reports regularly and initiates data gathering with a randomized delay.
Timing diagram of the scheduled gathering process - month
The diagram shows that data gathering occurs only on the last three working days of the month, consistent with the numberOfDays and workdayOnly parameters.
The ACR-CV converter sleeps most of the time but wakes up for specific activities, including sending beacon reports and send once data at regular intervals as specified by script parameters.
Periodic gathering
The periodic gathering process sends data at regular intervals defined by the days - pDays, hours - pHrs, and minutes - pMins parameters.
...
-- Scheduled gathering --
workdayOnly = 1  -- true for workdays only, false for all days
numberOfDays = 0  -- number of days/workdays since end of month
startHour = 10  -- hour of start of the readout
randomizeSeconds = 7200  -- up to 7200s~2hrs of delayed start since startHour
-- Periodic gathering ---
pDays = 0  -- period of days for sending data
pHrs = 2  -- period of hours for sending data
pMins = 0  -- period of minutes for sending data
...
------- Timeouts --------
beaconT = 1*4  -- sending beacon interval (4*15min = 1h)
...
If you want to only use the periodic gathering process, set the numberOfDays parameter to 0.
Timing diagram of the periodic gathering process
Scheduled and periodic gathering
You can combine both scheduled and periodic gathering processes to send data at regular intervals and specific times. After the scheduled gathering process is completed, the device will start sending data at regular intervals until the next scheduled gathering process.
...
-- Scheduled gathering --
workdayOnly = 1  -- true for workdays only, false for all days
numberOfDays = 31  -- number of days/workdays since end of month
startHour = 11  -- hour of start of the readout
randomizeSeconds = 7200  -- up to 7200s~2hrs of delayed start since startHour
-- Periodic gathering ---
pDays = 0  -- period of days for sending data
pHrs = 1  -- period of hours for sending data
pMins = 0  -- period of minutes for sending data
...
------- Timeouts --------
beaconT = 1*4  -- sending beacon interval (4*15min = 1h)
...
Timing diagram of the scheduled and periodic gathering process - day
Filtering
The filtering parameters allow you to specify which devices to listen to. You can filter devices based on their device type - allowedDevTypes, manufacturer ID - allowedManIDs, and device ID - allowedIDs. If the parameters are empty, the device will listen to all devices.
...
------- Filtering -------
allowedDevTypes = {
    0x06,  -- Electricity meter
    0x07,  -- Gas meter
    0x08  -- Water meter
}
allowedManIDs = {
    0x0442,  -- ABB
    0x4DAC  -- Siemens
}
allowedIDs = {
    0x1A2B3C4D,  -- ABB Electricity meter (hex)
    438221967,  -- ABB Water meter (int)
    1599954179,  -- Siemens Gas meter (int)
    0x5F6E7DAC  -- Siemens Water meter (hex)
}
sontexIDs = {28725033, 27632659}
sontexIDsFreqOffs = {10000}
...
Example of filtering parameters for specific ABB, Siemens and Sontex devices.
Configuration messages
To change the configuration of the device, you can send messages to the device using the MQTT broker. Device subscribes to the topic and changes the configuration based on the received message.
The messages must be retained. Device does not mantain the connection to the broker but connects periodically to send the messages. Non-retained messages will not be received when the device reconnects.
Changing the script parameters
Topic: acrios/<IMSI>/up/config
Messages are in JSON format and can contain any of the global parameters from the script. The device will apply changes after sending the beacon message. After the changes are successfully applied, the device will:
- Clear message from
acrios/<IMSI>/up/configtopic. - Publish the changed parameters to the
acrios/<IMSI>/configtopic.
Example:
Topic:
acrios/901405103467181/up/config
Message:
{
    "allowedIDs": [152097, 301591123, 0x67380781, 0x95794144, 0x19854733],
    "sontexIDs": [16569212, 28725033],
    "beaconT": 32
}
Ensure the JSON parameters in configuration messages are correctly formatted, as the device will not apply changes otherwise:
allowedIDsmust be an [array]sontexIDsmust be an [array]mtblmust be a {table}
Entries in allowedIDs with the 0x prefix denote wM-Bus IDs, while those without the prefix represent Apator Metra IDs.
Actions
Topic: acrios/<IMSI>/up/action
Messages contain the Lua script commands that the device will execute. The device will execute the commands after sending the beacon message:
- If the
clearAction()command is included at the end of the message, the device clears the message after execution. - If the
clearAction()command is not included, the device will execute the commands every time it sends a beacon message, effectively scheduling the commands to repeat.
Example:
Topic:
acrios/901405103467181/up/action
Message:
api.ledControl(1)
api.delayms(1000)
api.ledControl(0)
clearAction()
The device will turn on the LED for 1 second and then turn it off. This is a one-time action.
Private MQTT Broker
Please refer to the Mosquitto Broker manual for information on how to set up a private Mosquitto MQTT broker.
Parsing
Please refer to the MQTT Parsers manual for information on how to parse the messages received from the device.
HiveMQ
HiveMQ's public broker and serverless clusters can sometimes be too busy, leading to message loss or non-delivery. For critical applications, consider using a dedicated broker or a more reliable solution (HiveMQ starter cluster).
Public HiveMQ MQTT broker
HiveMQ is a public MQTT broker that can be used for testing and development purposes. The broker is available at broker.hivemq.com. You can check messages from our testing device by subscribing to the topic acrios/230029530002847/#.
- Navigate to HiveMQ browser client at www.hivemq.com/demos/websocket-client/.
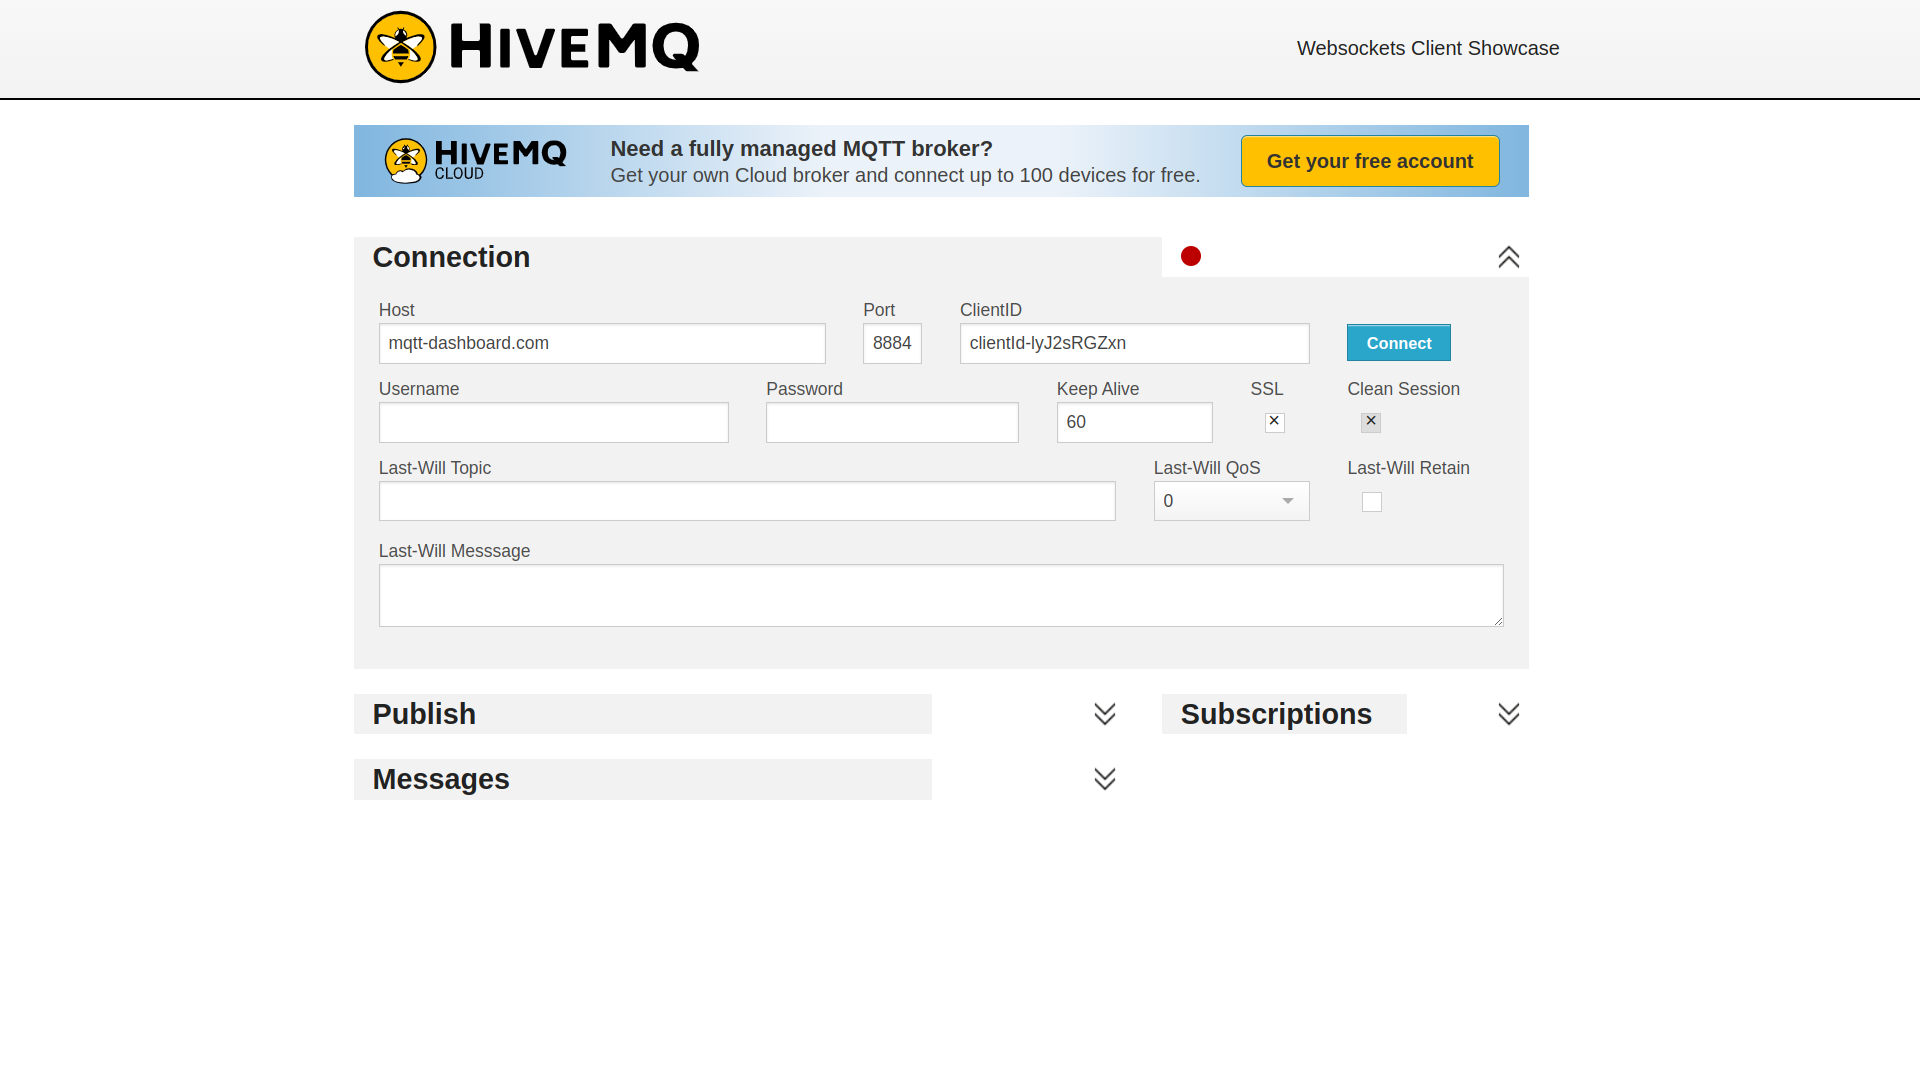
- Connect to the broker by entering the server address
broker.hivemq.comusing default port8884.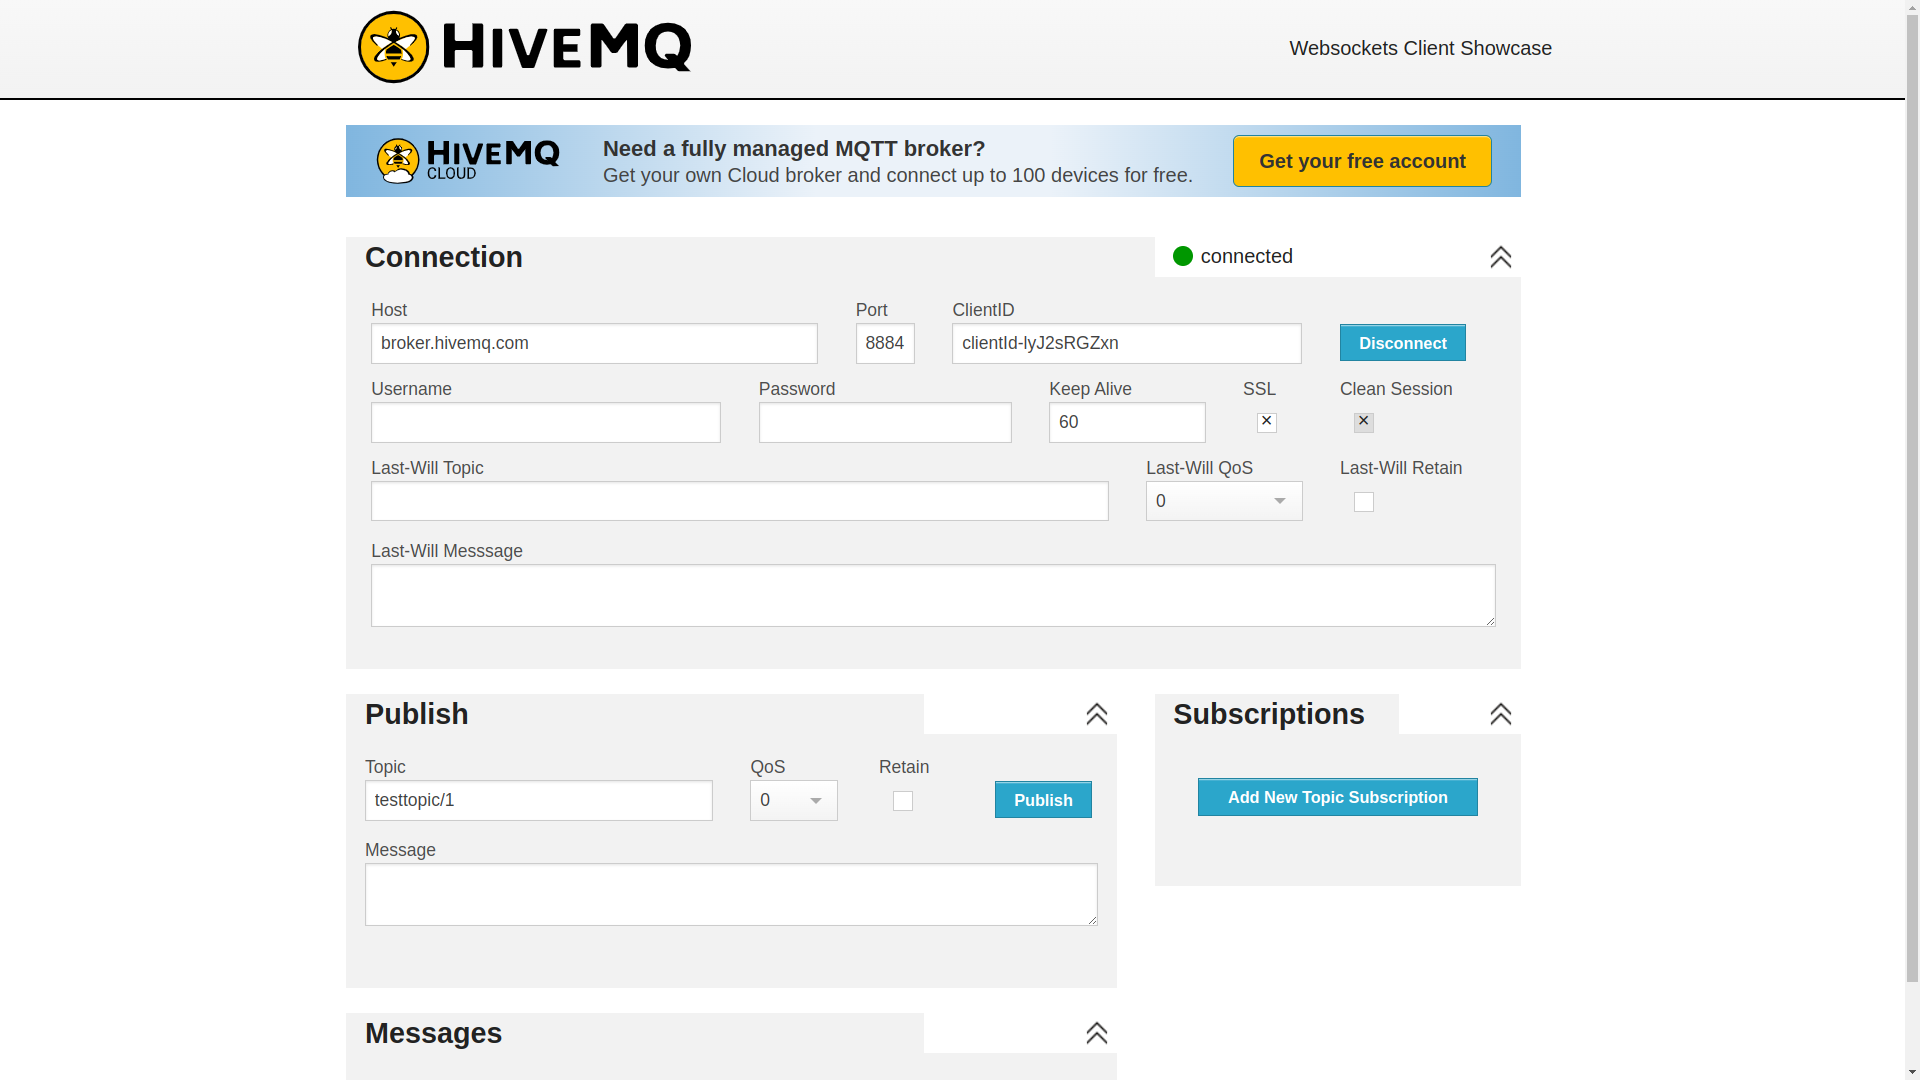
- Subscribe to the topic
acrios/230029530002847/#to receive messages from the device.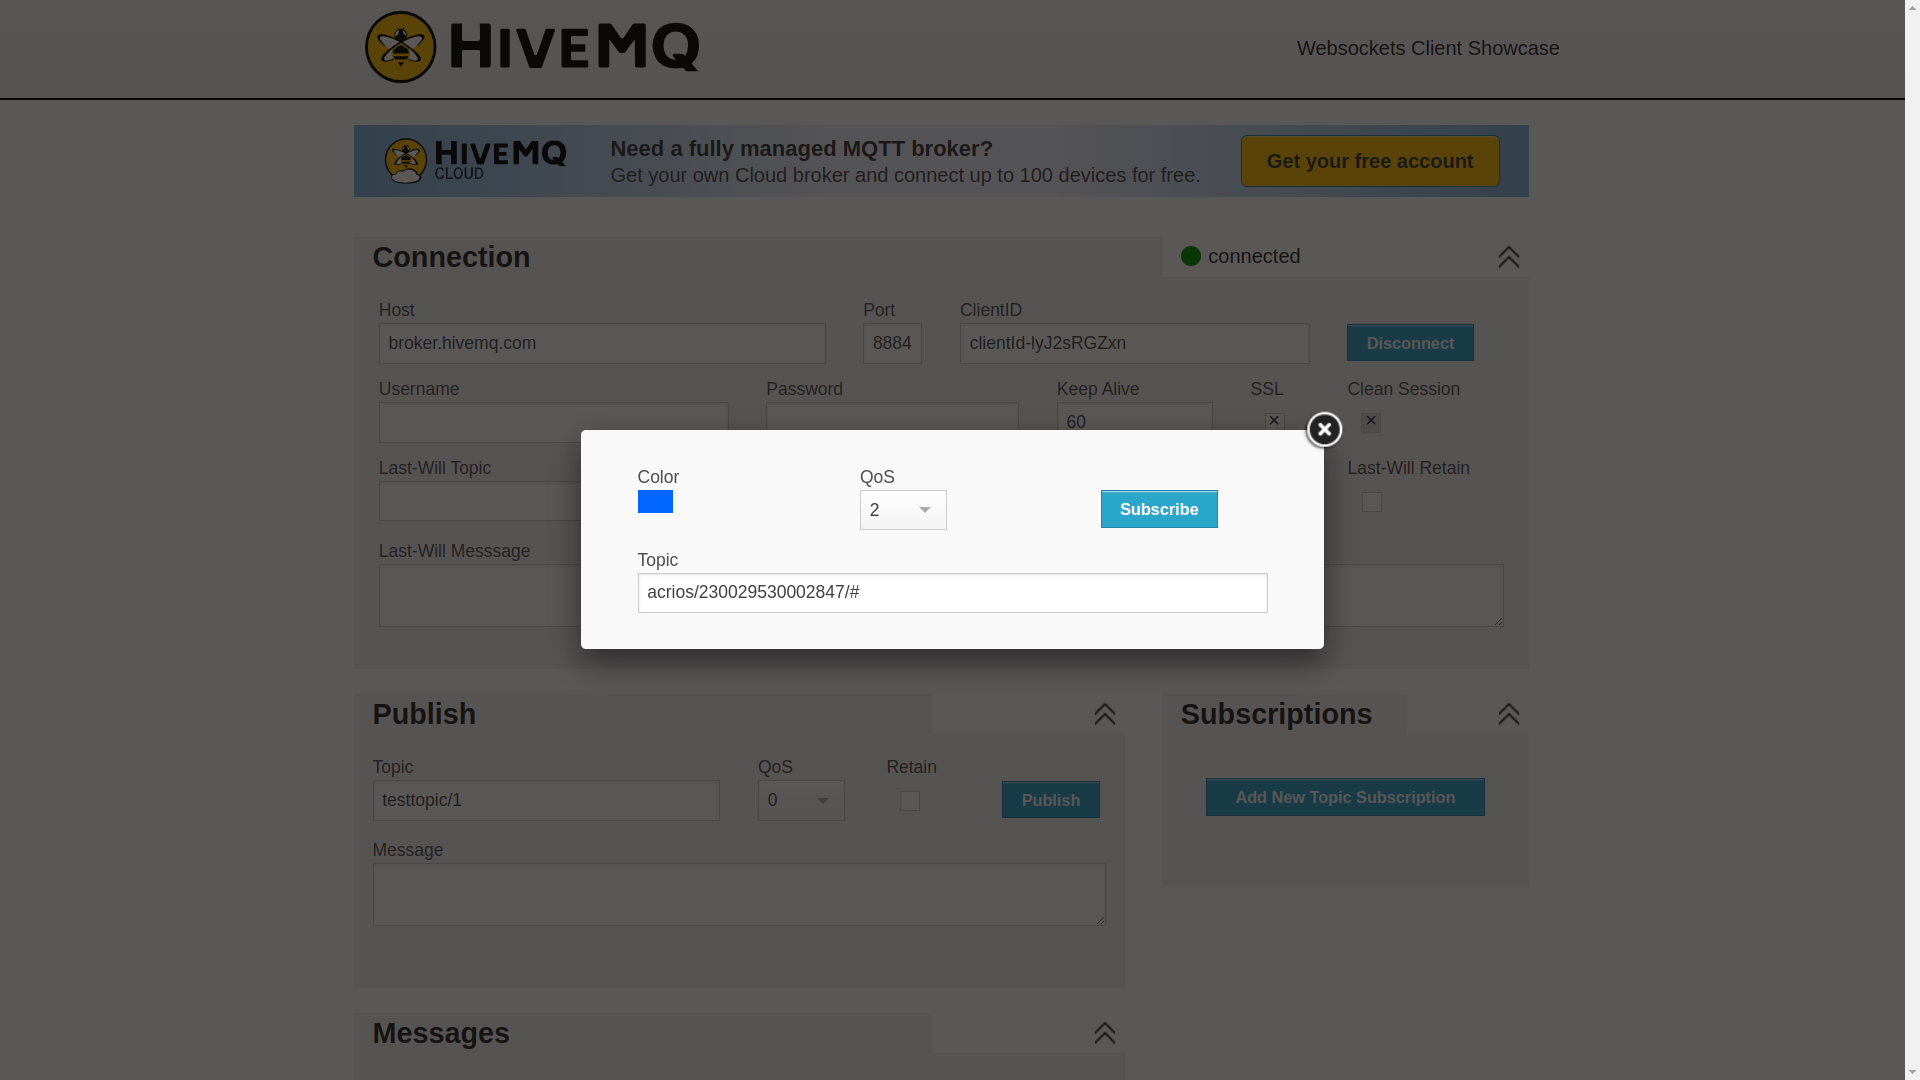
- Check the messages from the device.
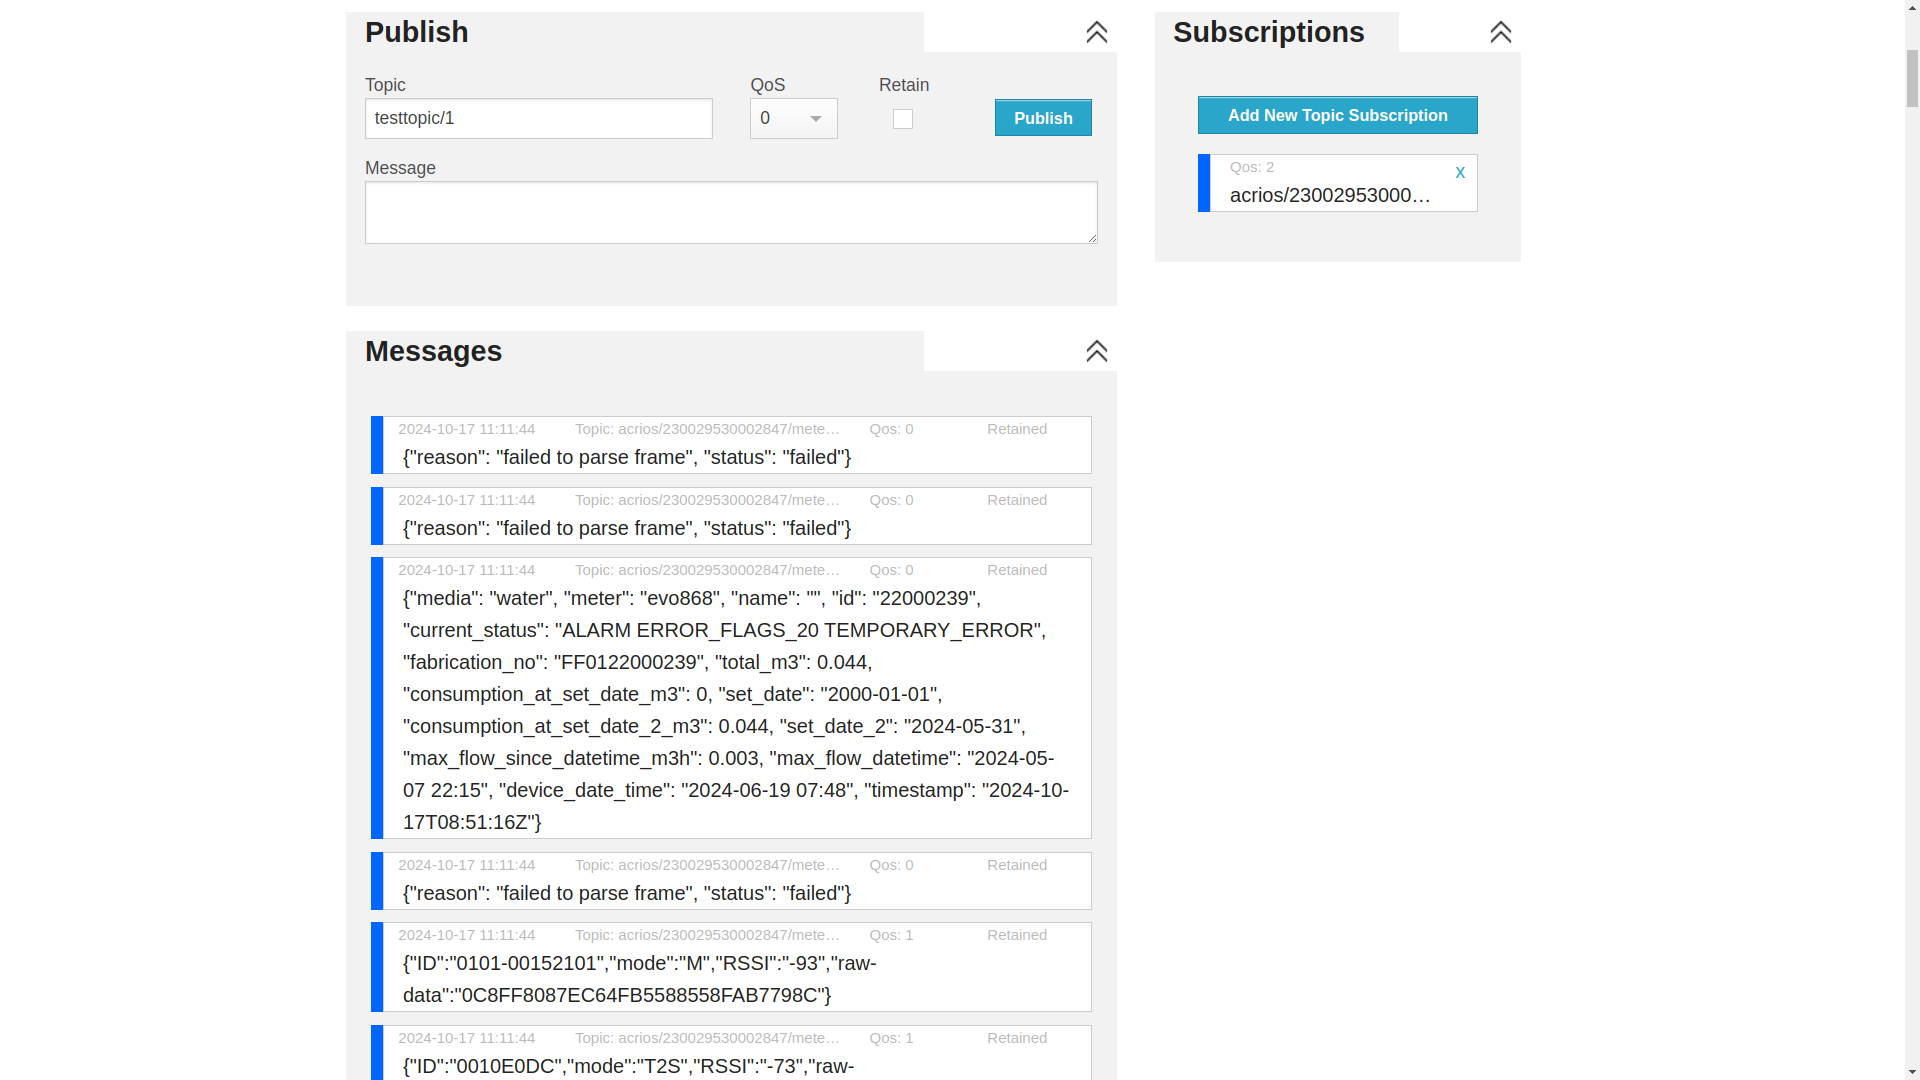
The broker.hivemq.com is a public broker. This means that any data you publish or subscribe to is accessible by anyone connected to the broker. It is not recommended to use this for sensitive or confidential data, as there is no privacy or security guarantee. For production systems, consider using a secure and private MQTT broker.
Proceed with caution and ensure you are only testing or sharing non-sensitive information.
Creating MQTT Broker
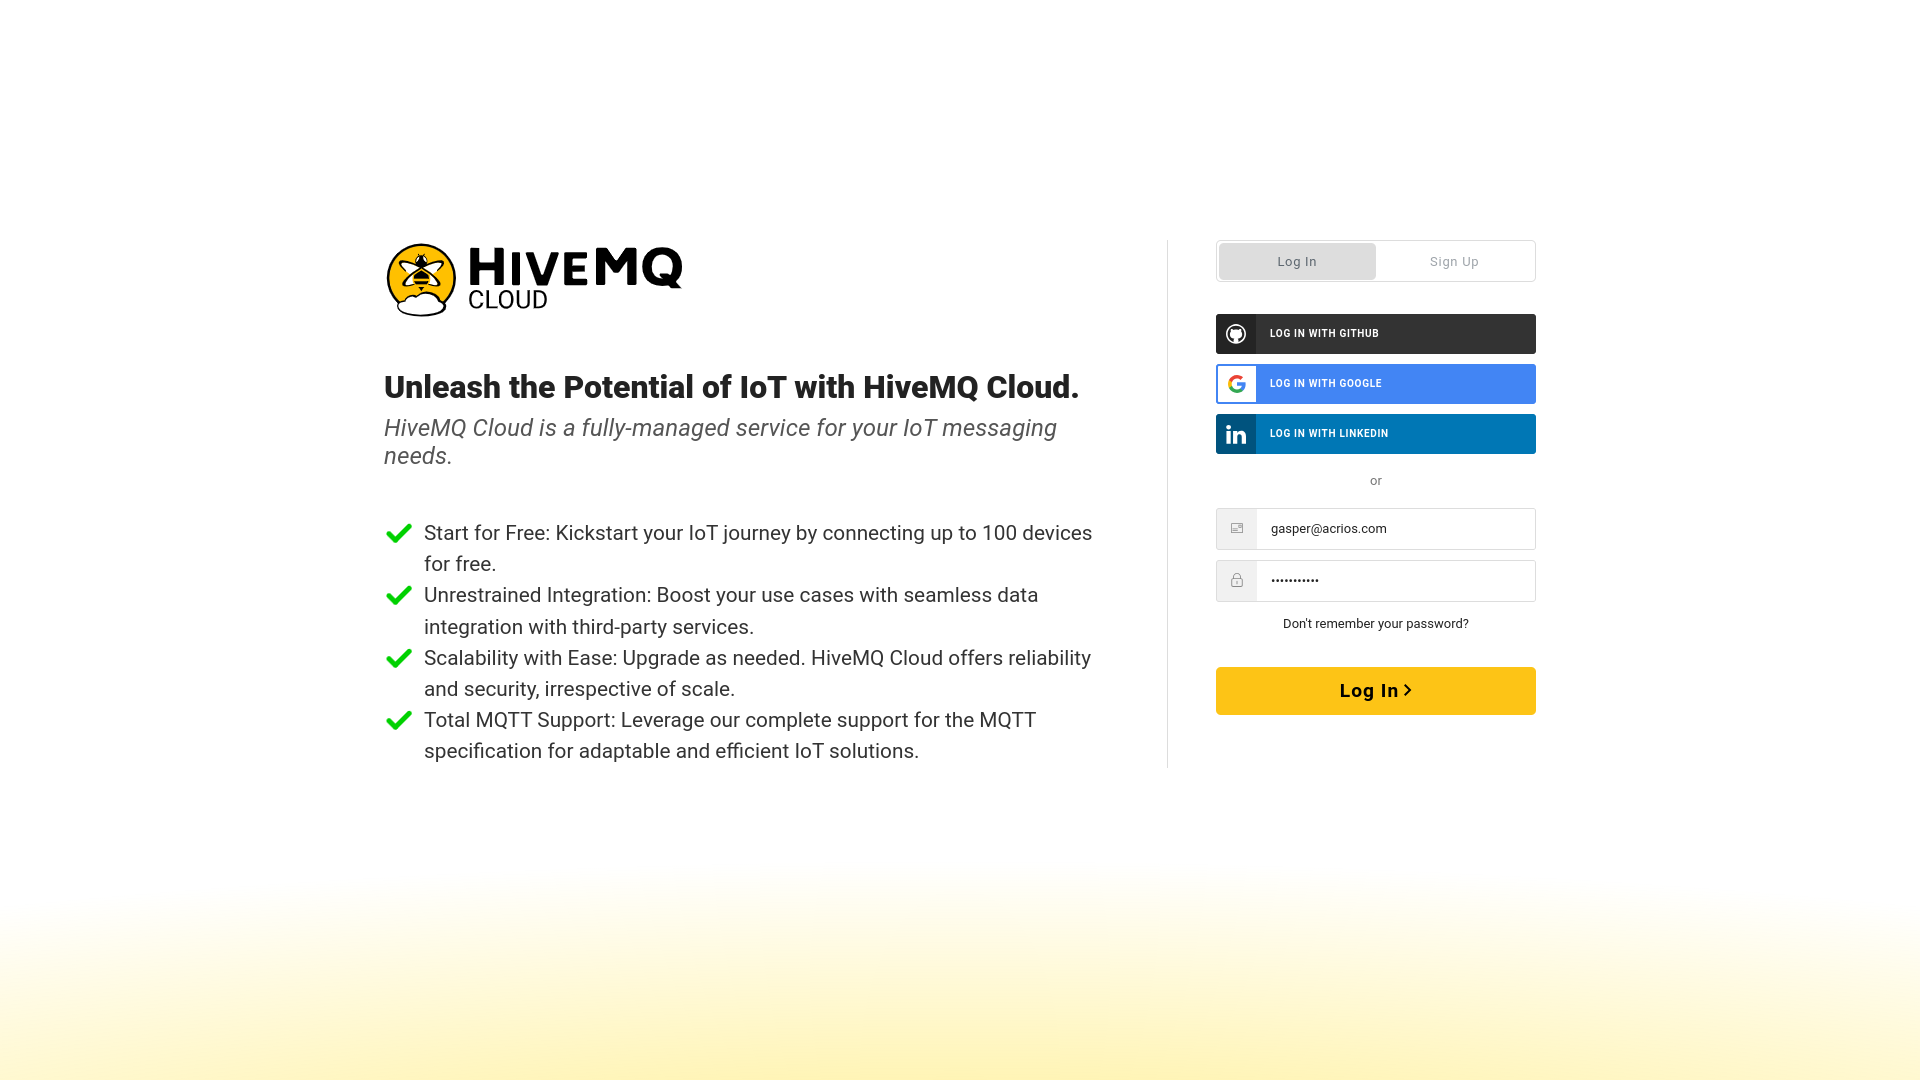
- Navigate to the HiveMQ Cloud at www.hivemq.com/products/mqtt-cloud-broker/ and click on Sign up free button.
- Create or log in to your account.
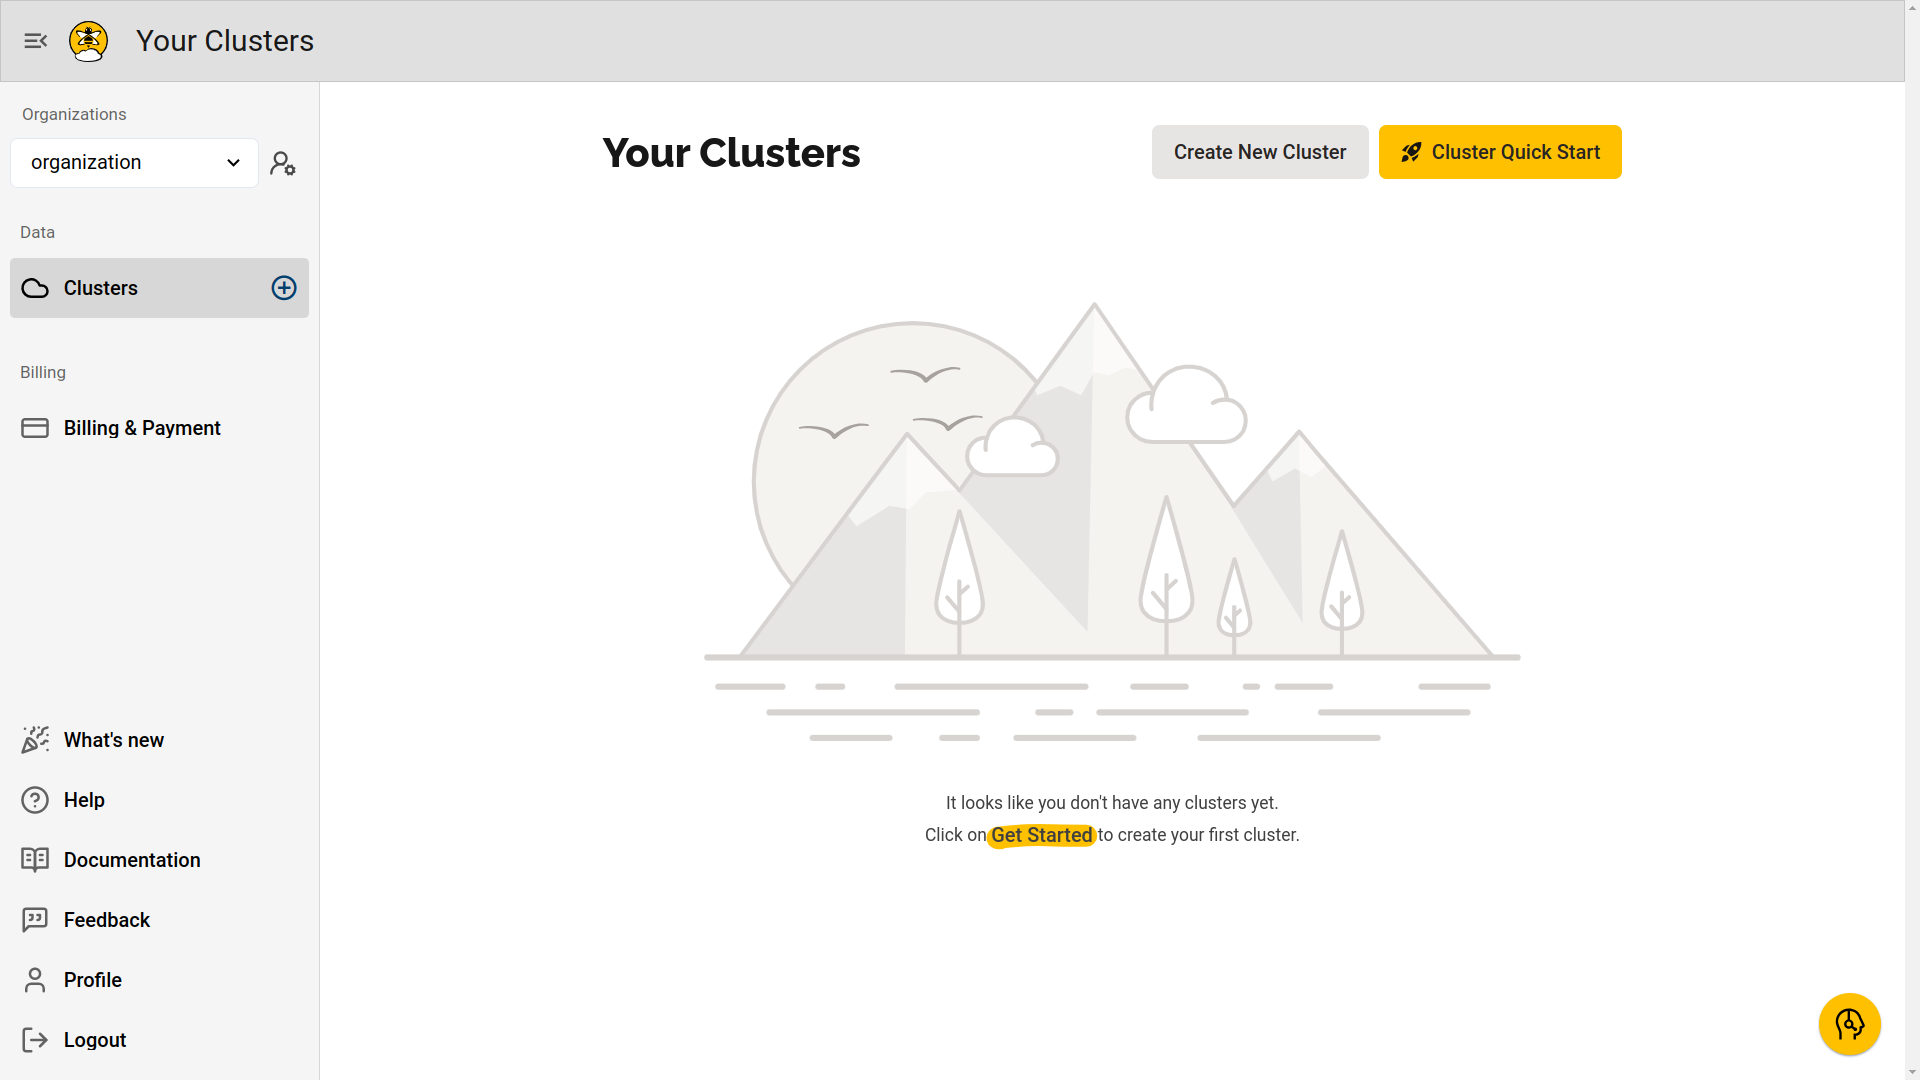
- Click on Create New Cluster button.
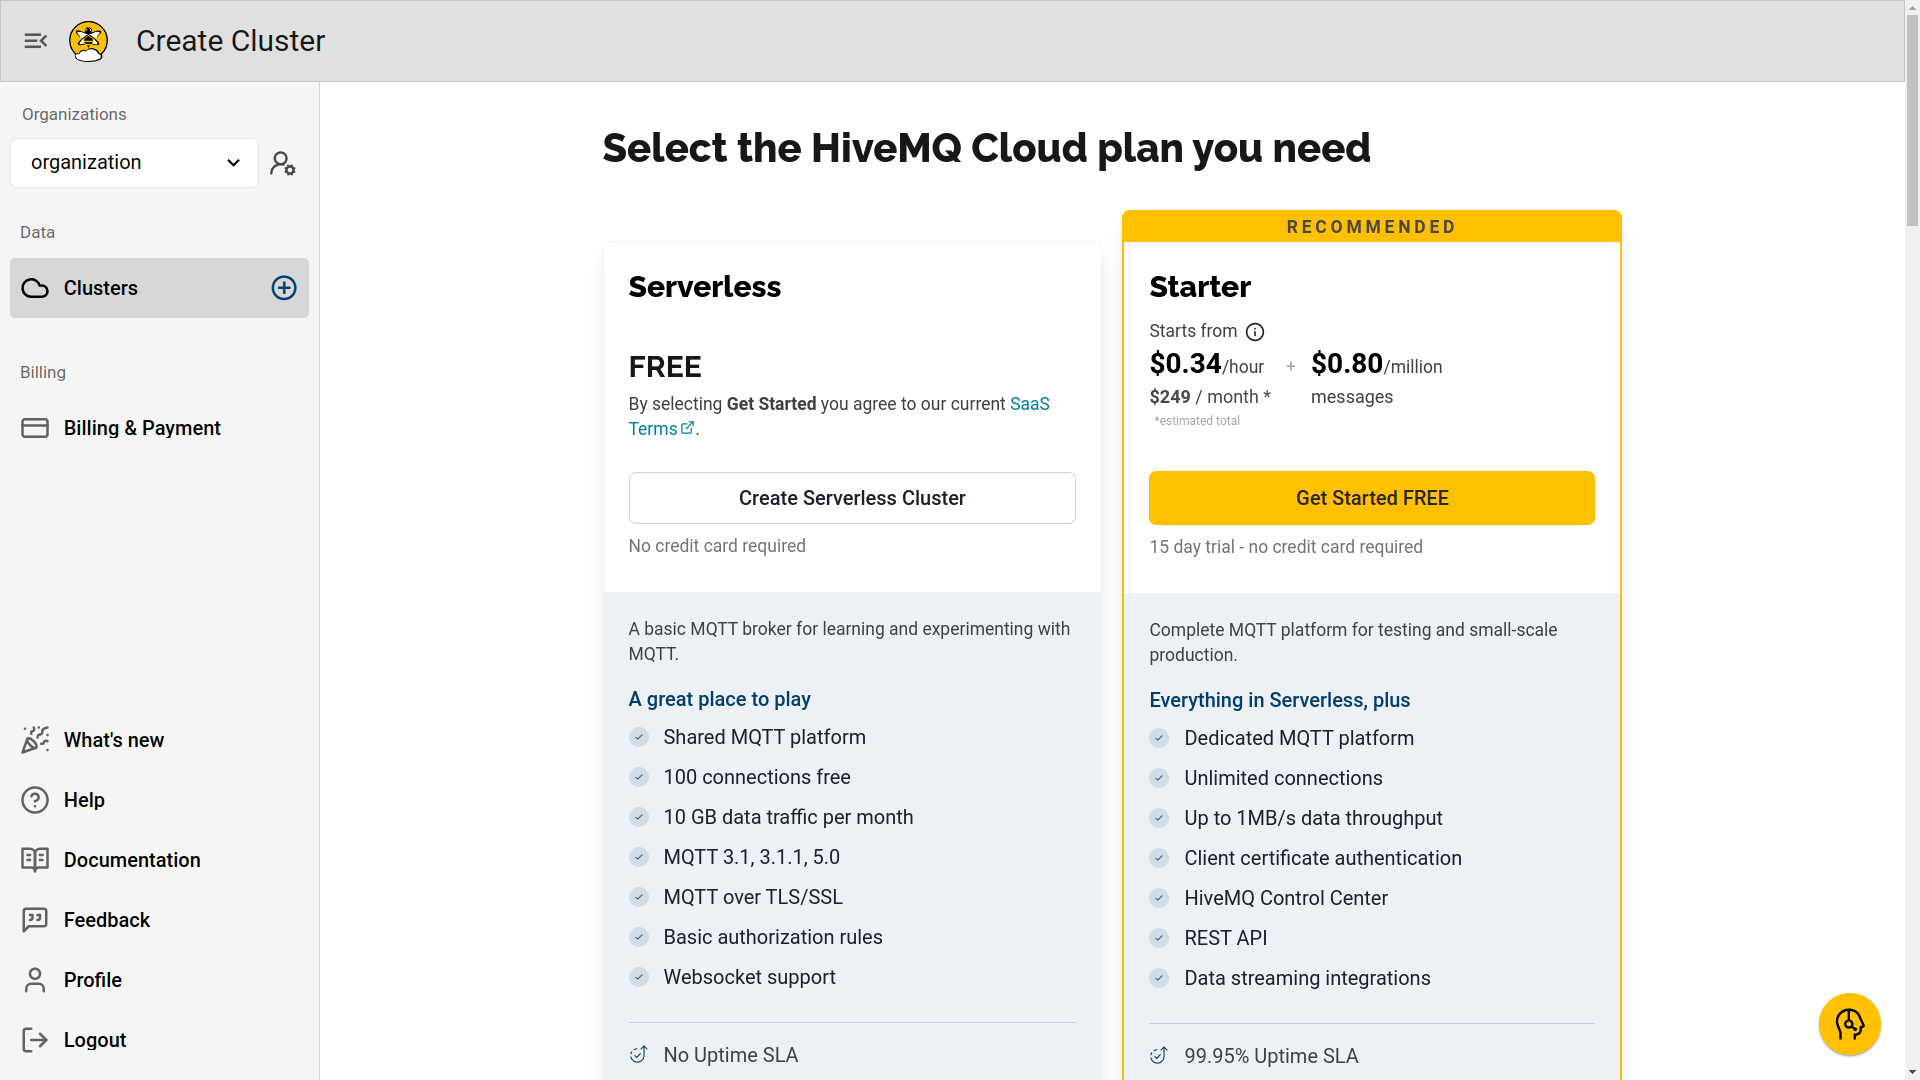
- Click on Create Serverless Cluster button.
info
HiveMQ also offers a paid Starter option with unlimited connections, better throughput, and more features.
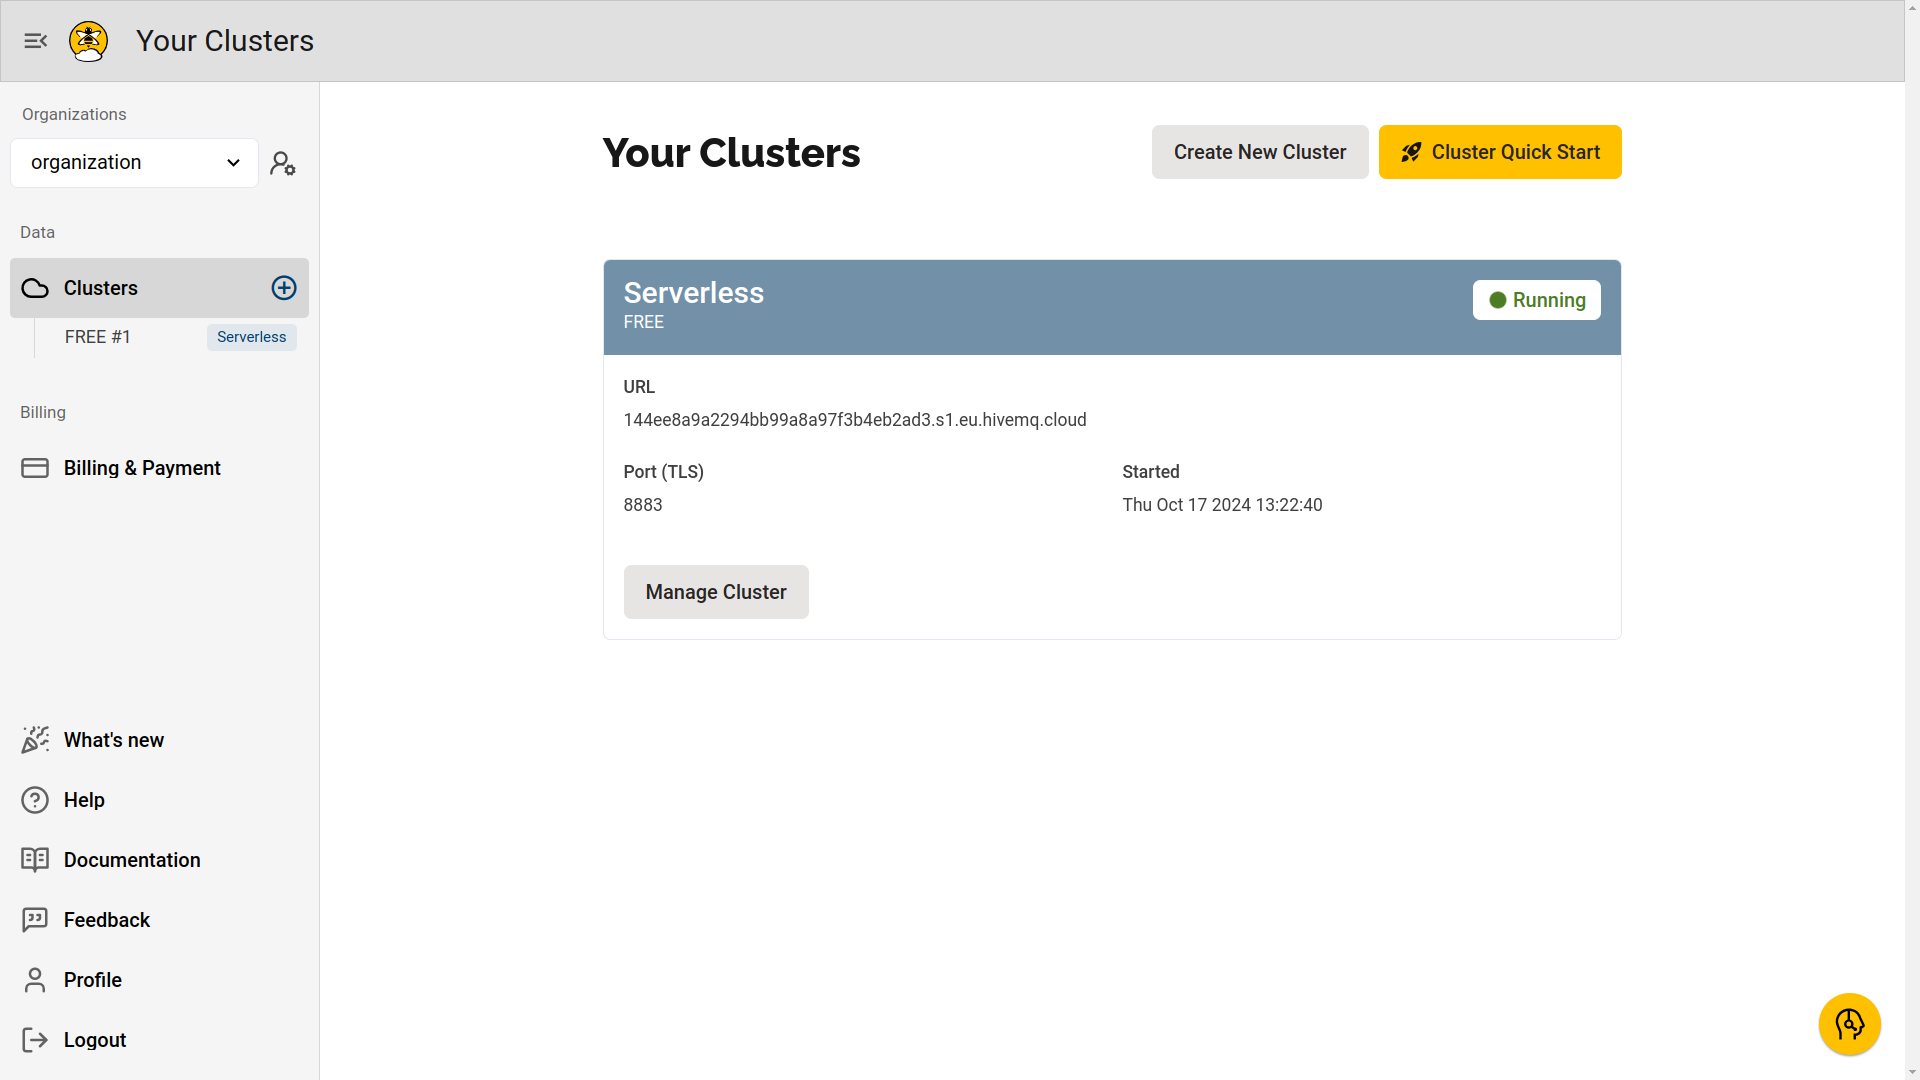
- Click on Manage Cluster button.
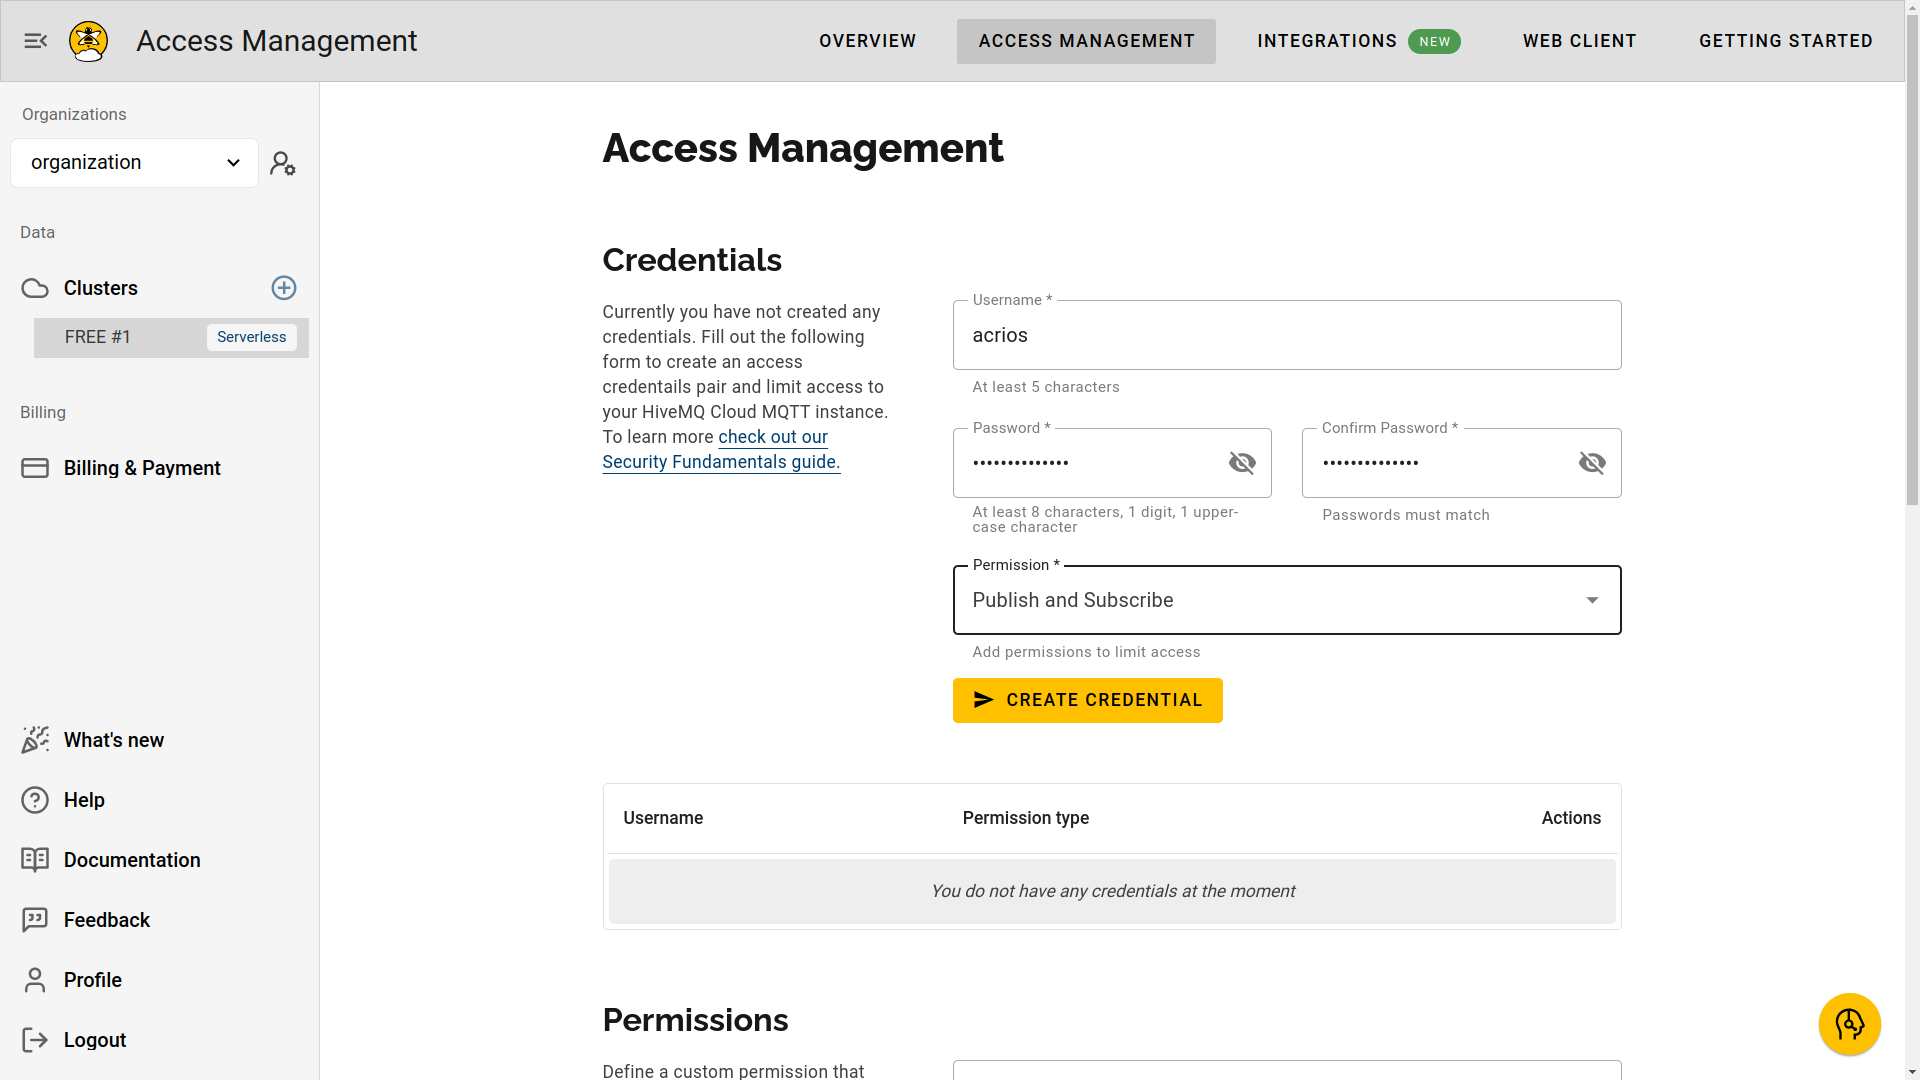
- Navigate to the ACCESS MANAGEMENT tab to create credentials for the MQTT client.
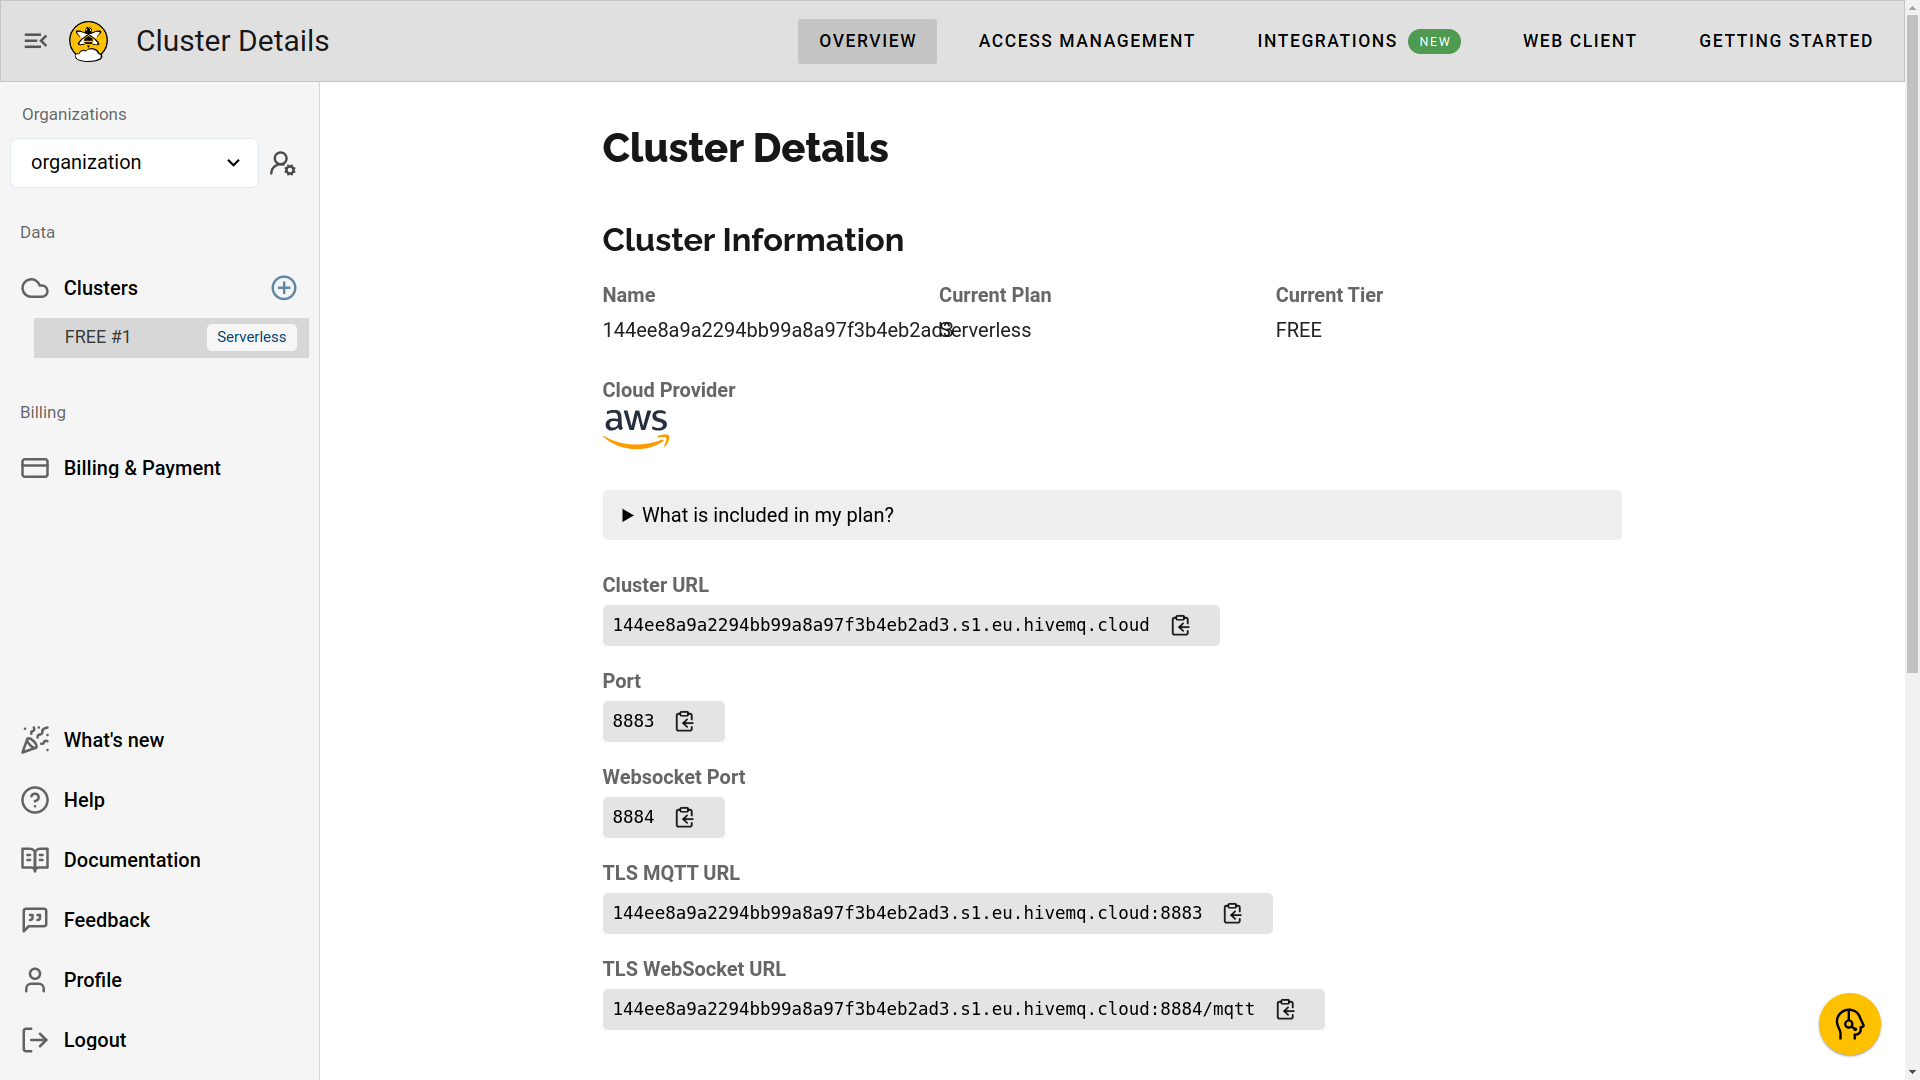
On the OVERVIEW tab, you can find all the server addresses and ports for the MQTT client connection.
- Fill in the username and password and select appropriate permissions, then click on CREATE CREDENTIAL button.
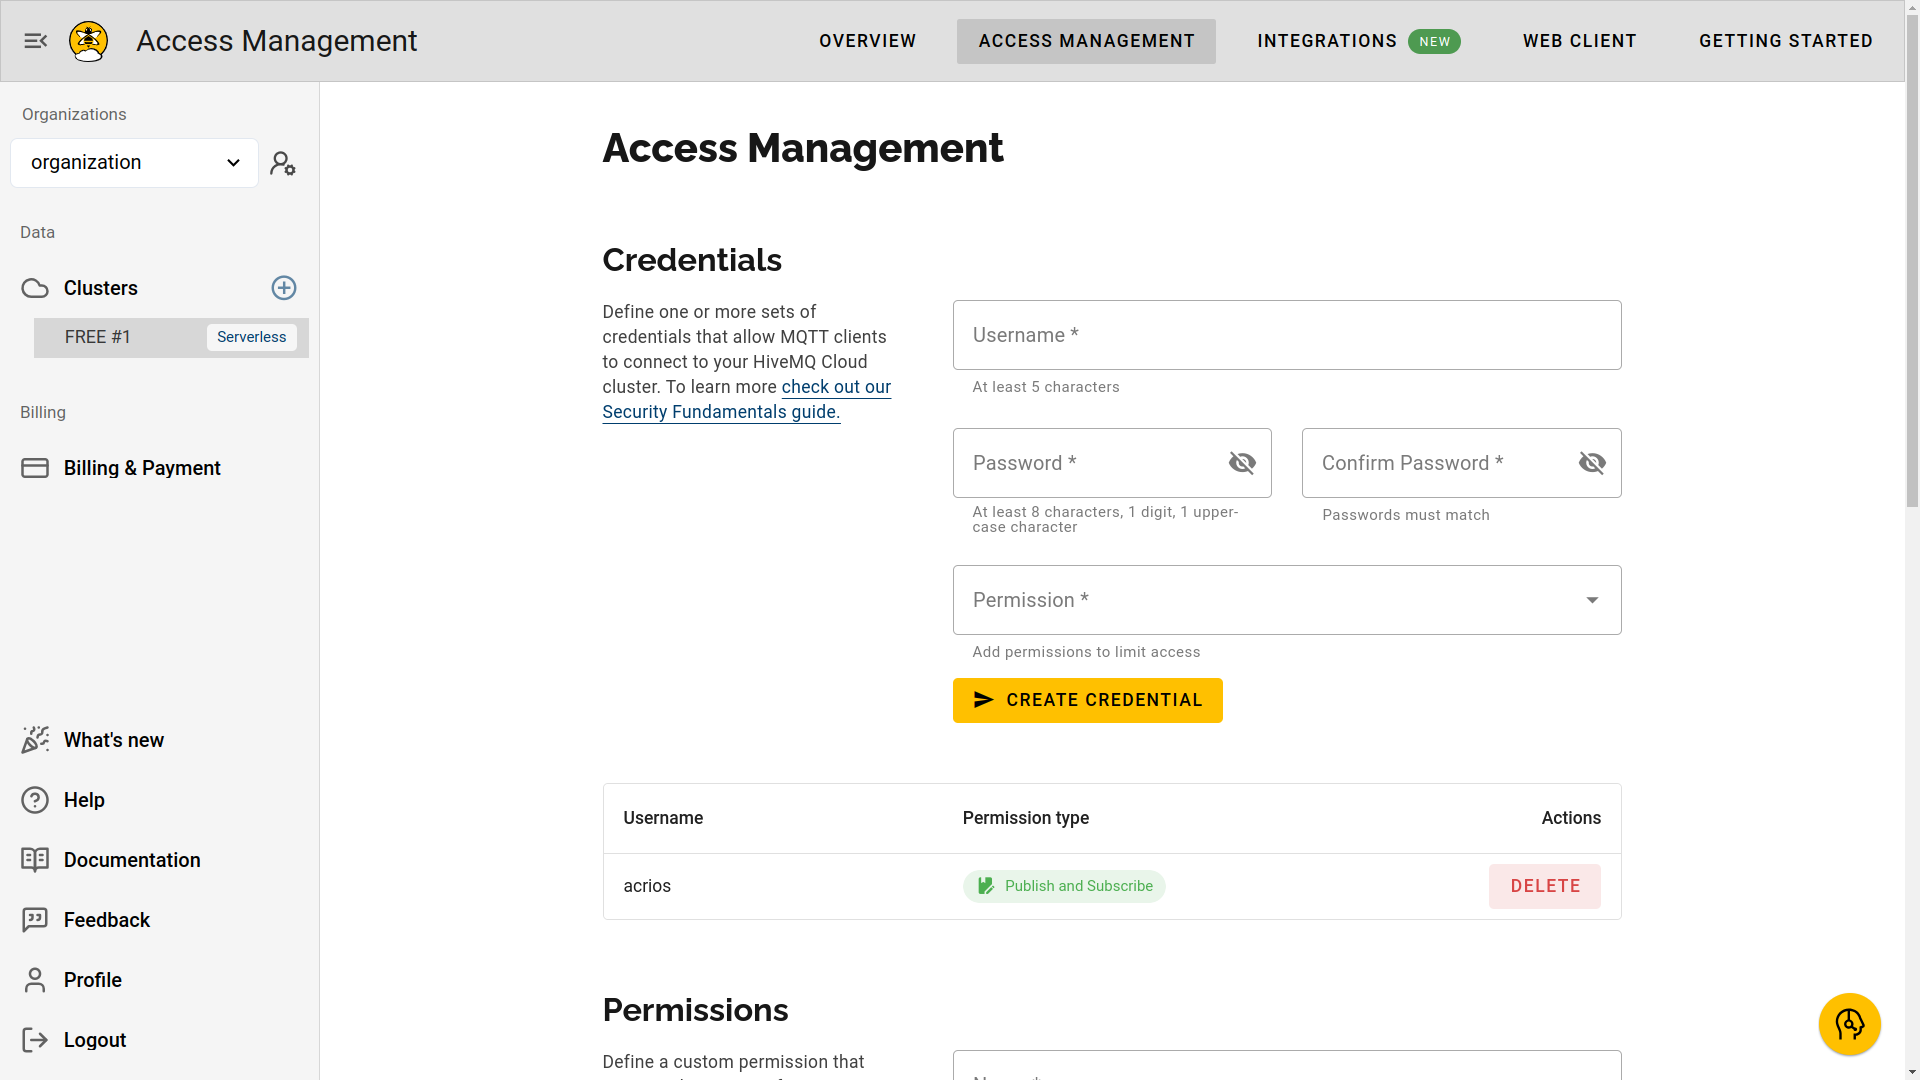
- The credentials are created and can be used for the MQTT client connection.
Testing MQTT Broker
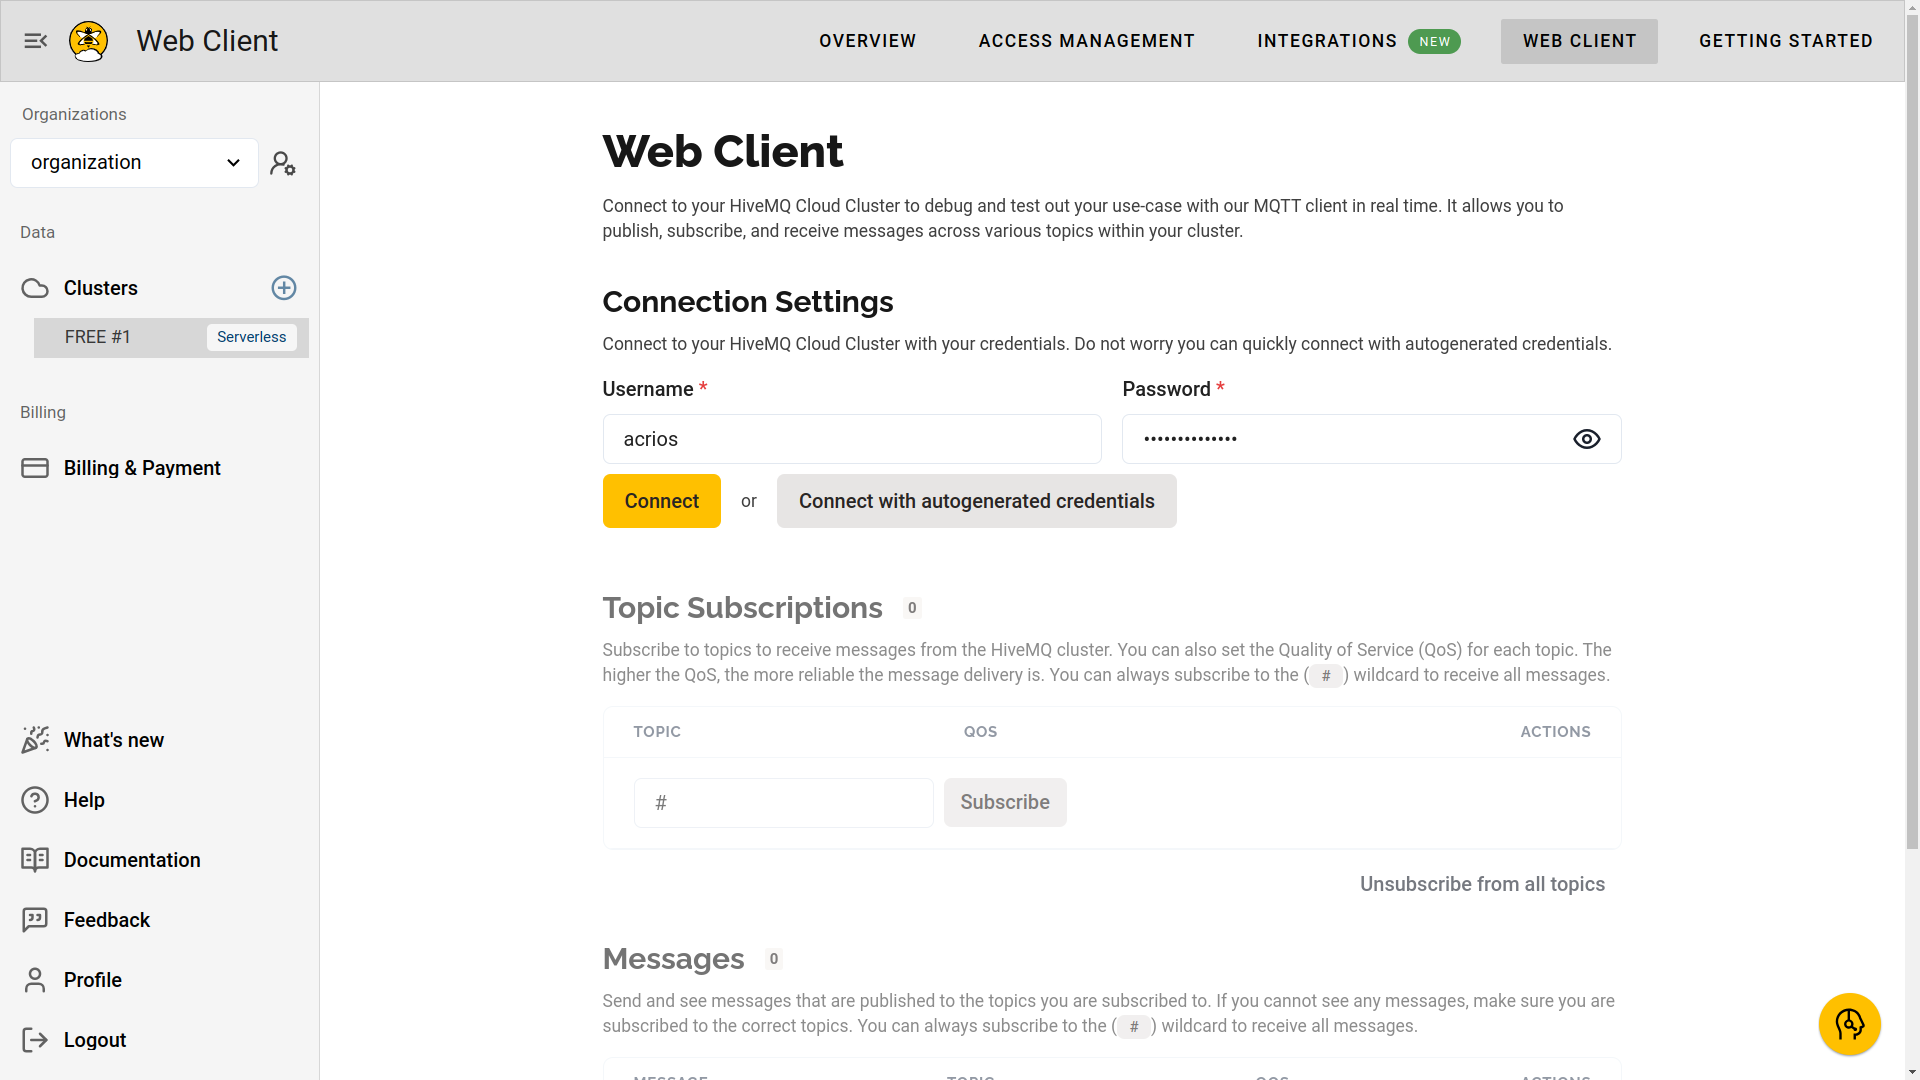
After creating the MQTT broker, you can test the connection using WEB CLIENT tab or the HiveMQ browser client.
- WEB CLIENT:
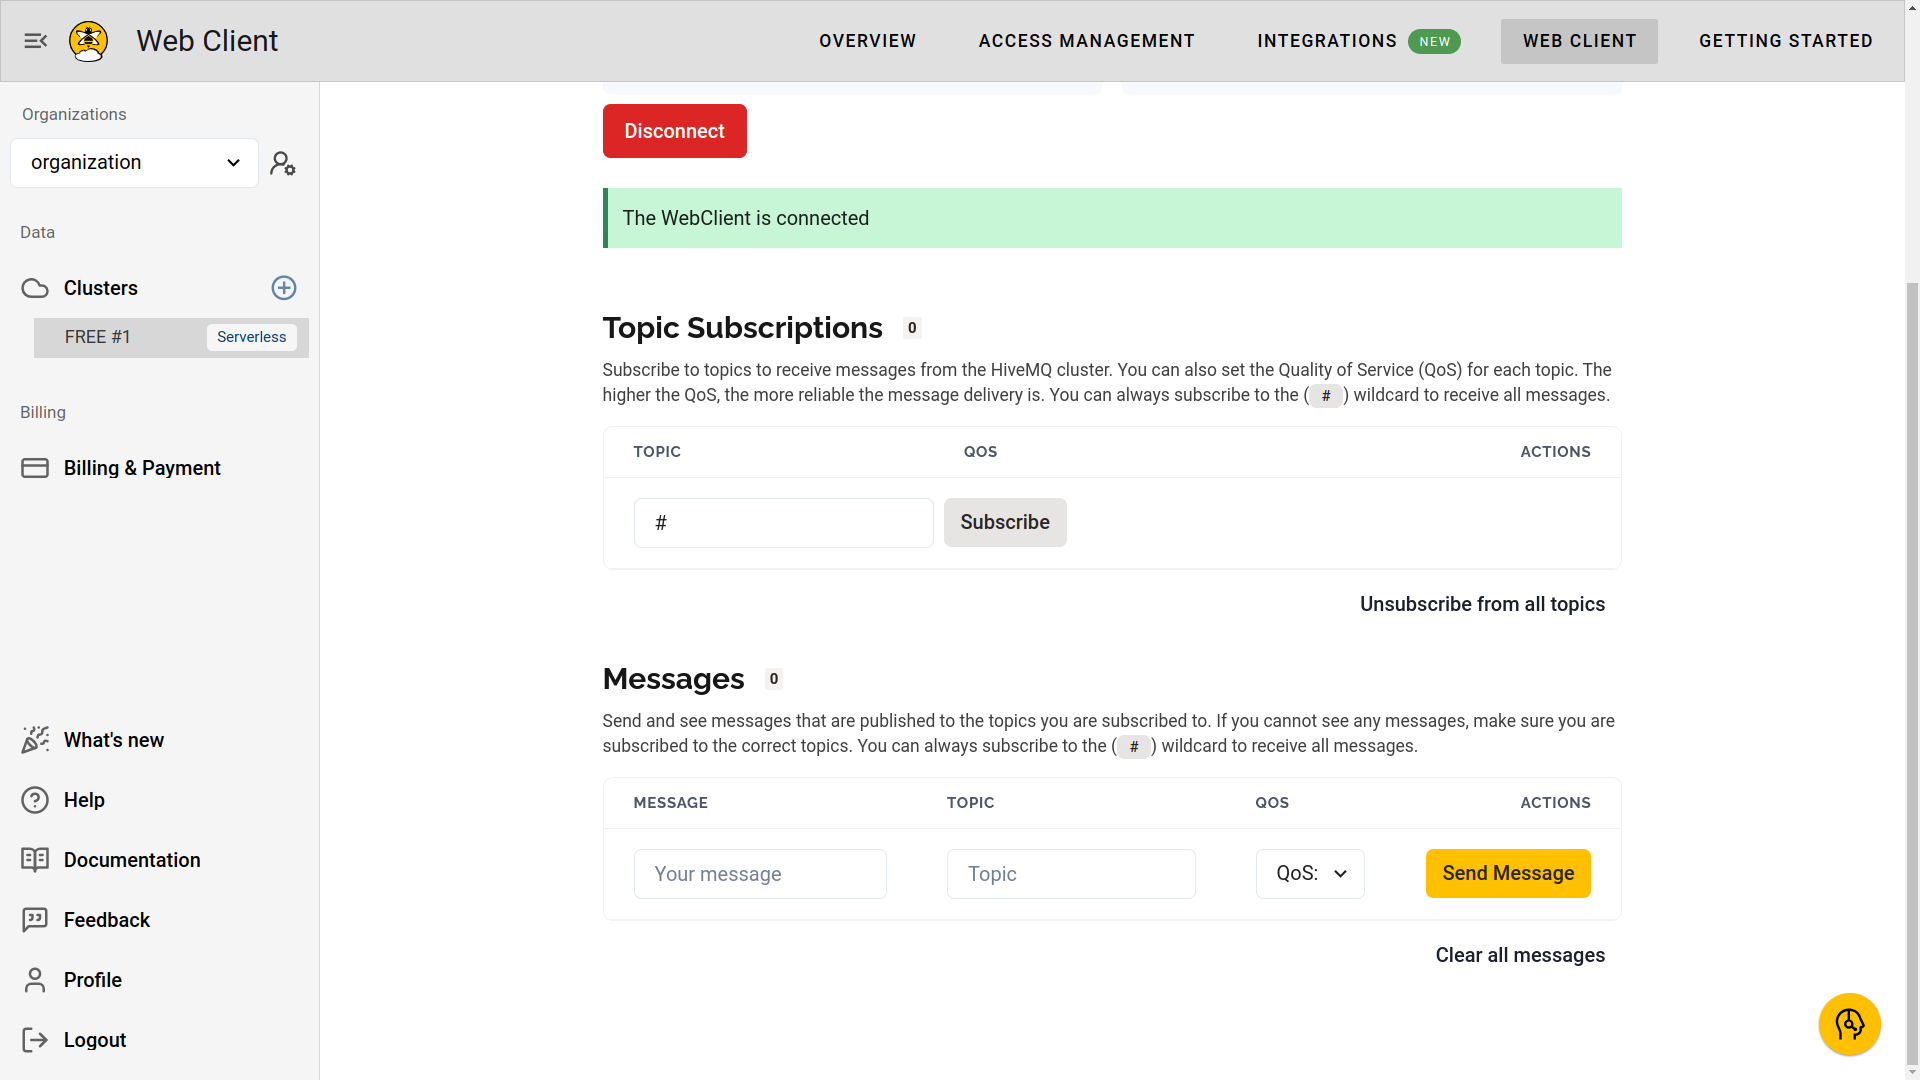
- Navigate to the WEB CLIENT tab, fill the credentials and click on Connect button.
- Scroll down to the Topic Subscription section and subscribe to the topic
#.
- Fill in the message and topic, then click on Send message button.
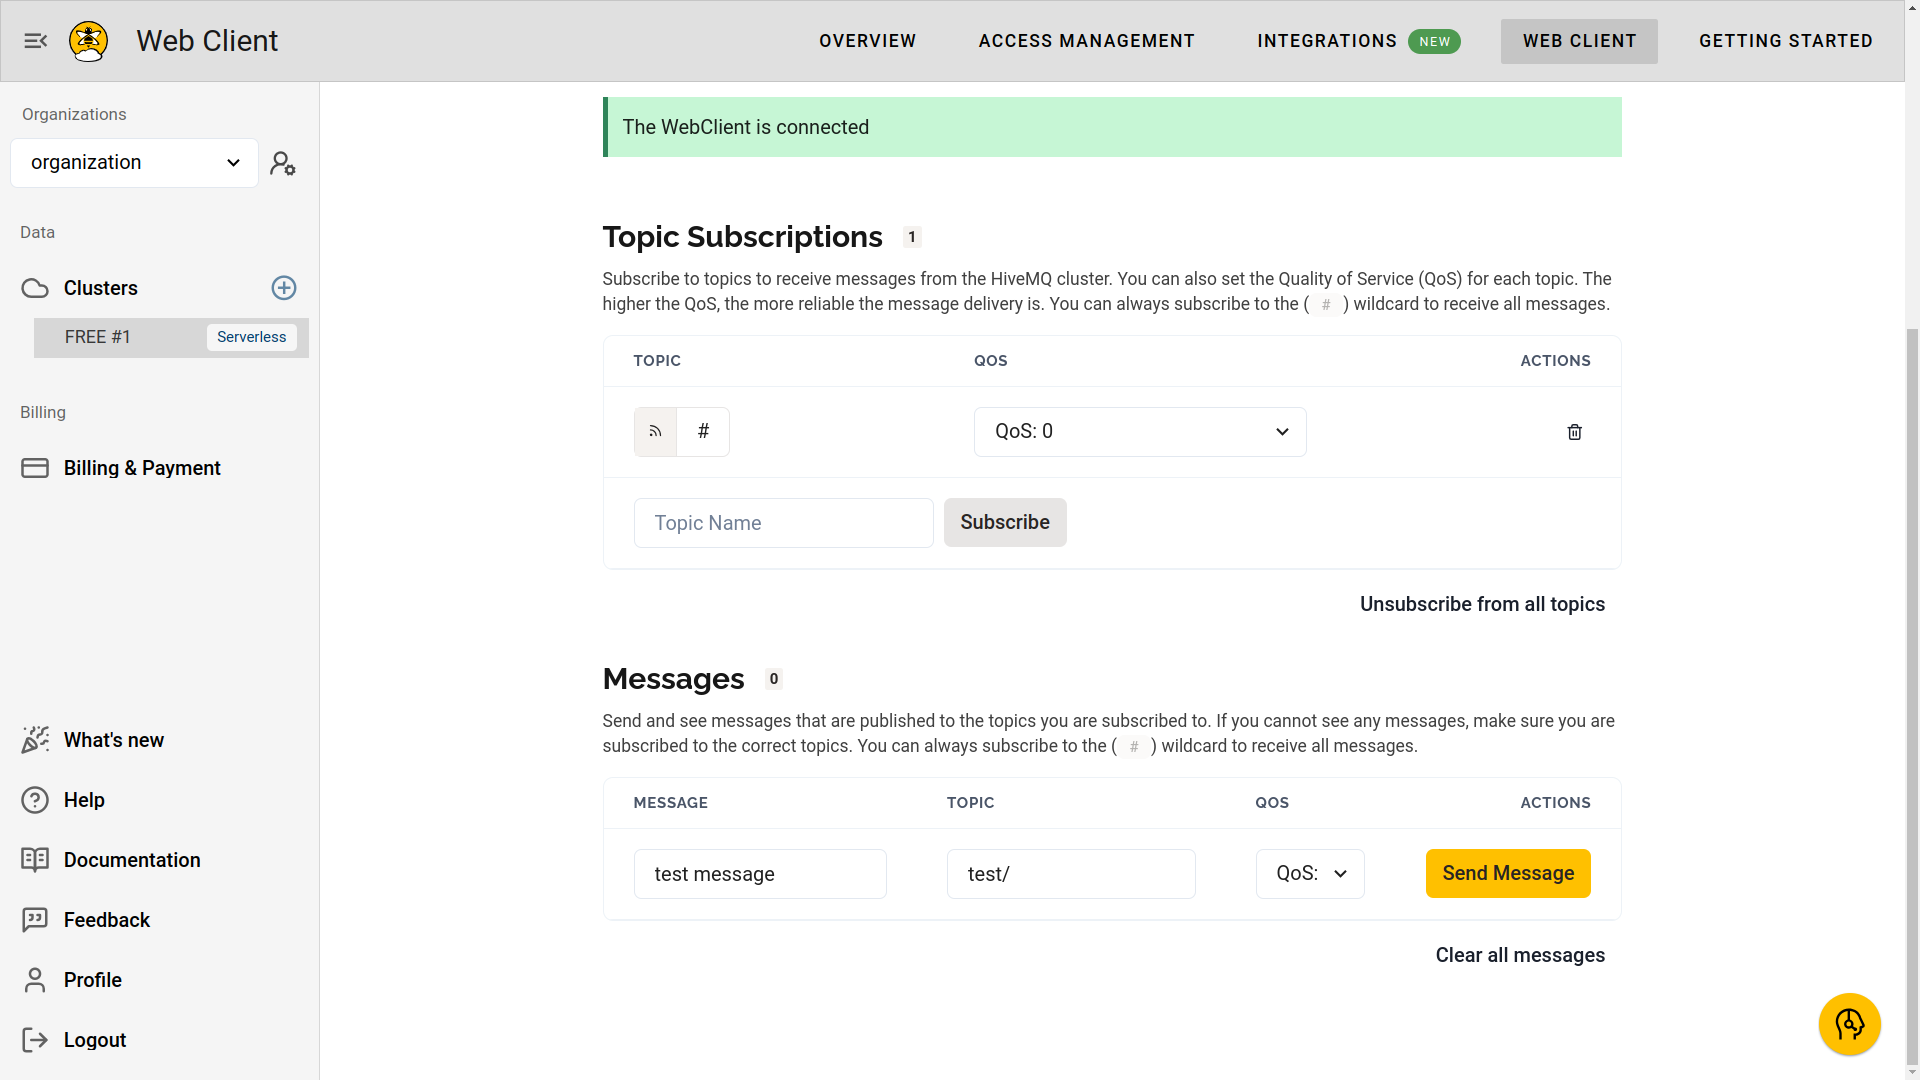
- Send messages should appear in the Messages section.
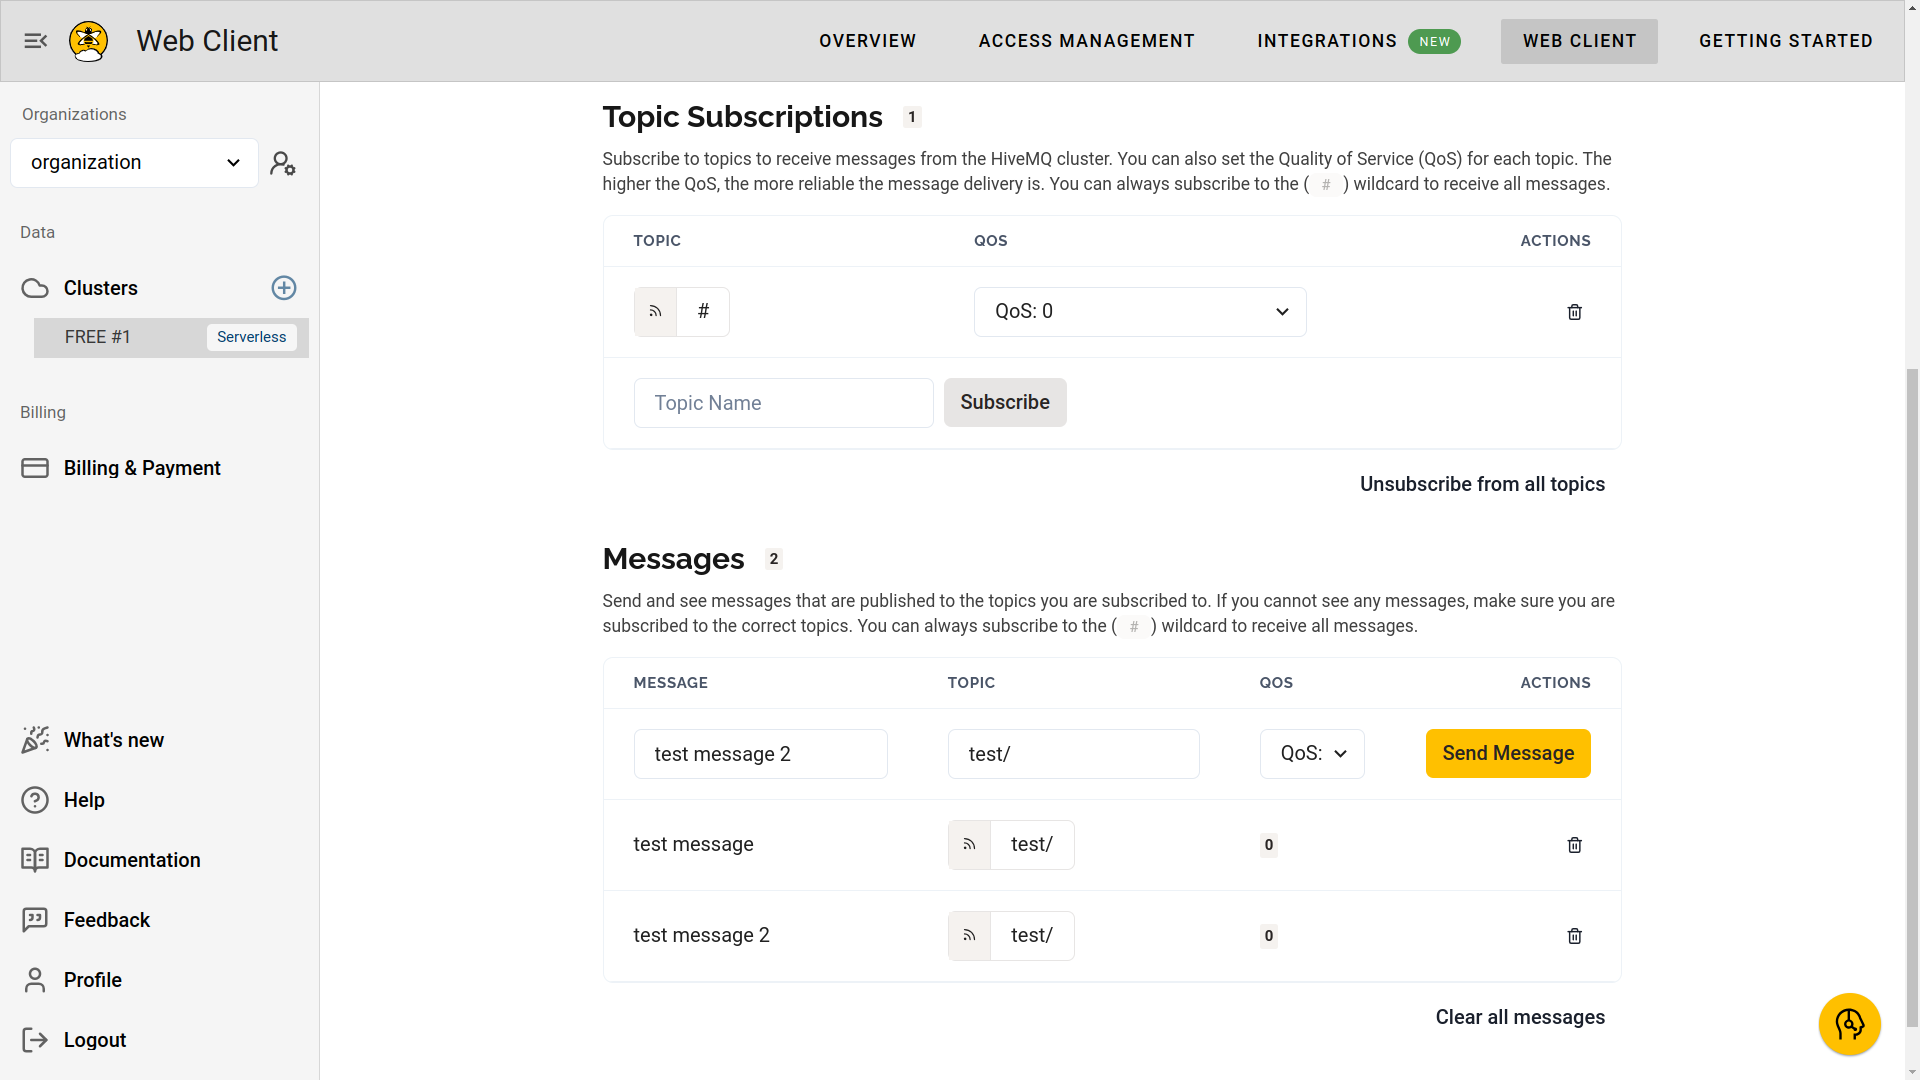
- Navigate to the WEB CLIENT tab, fill the credentials and click on Connect button.
- HiveMQ browser client:
- Navigate to the HiveMQ browser client, fill the host (cluster URL), username and password, then click on Connect button.
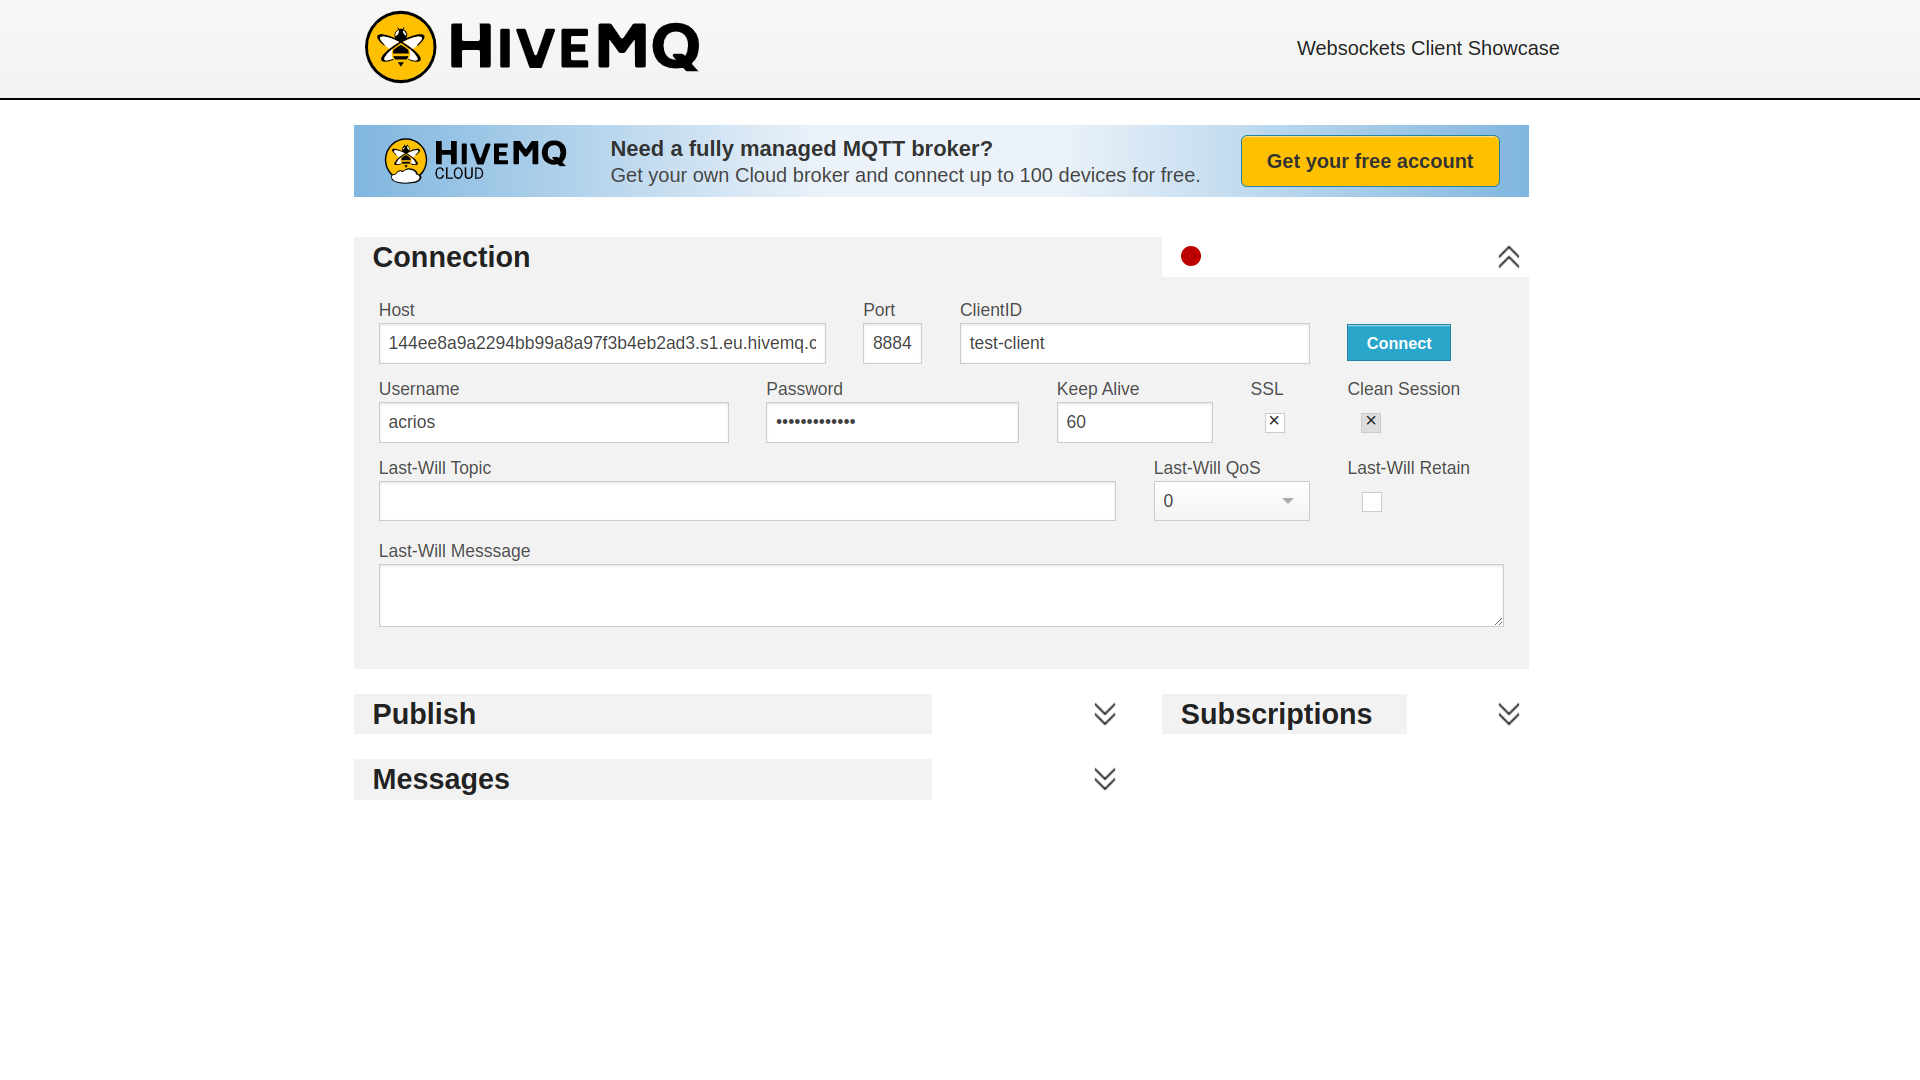
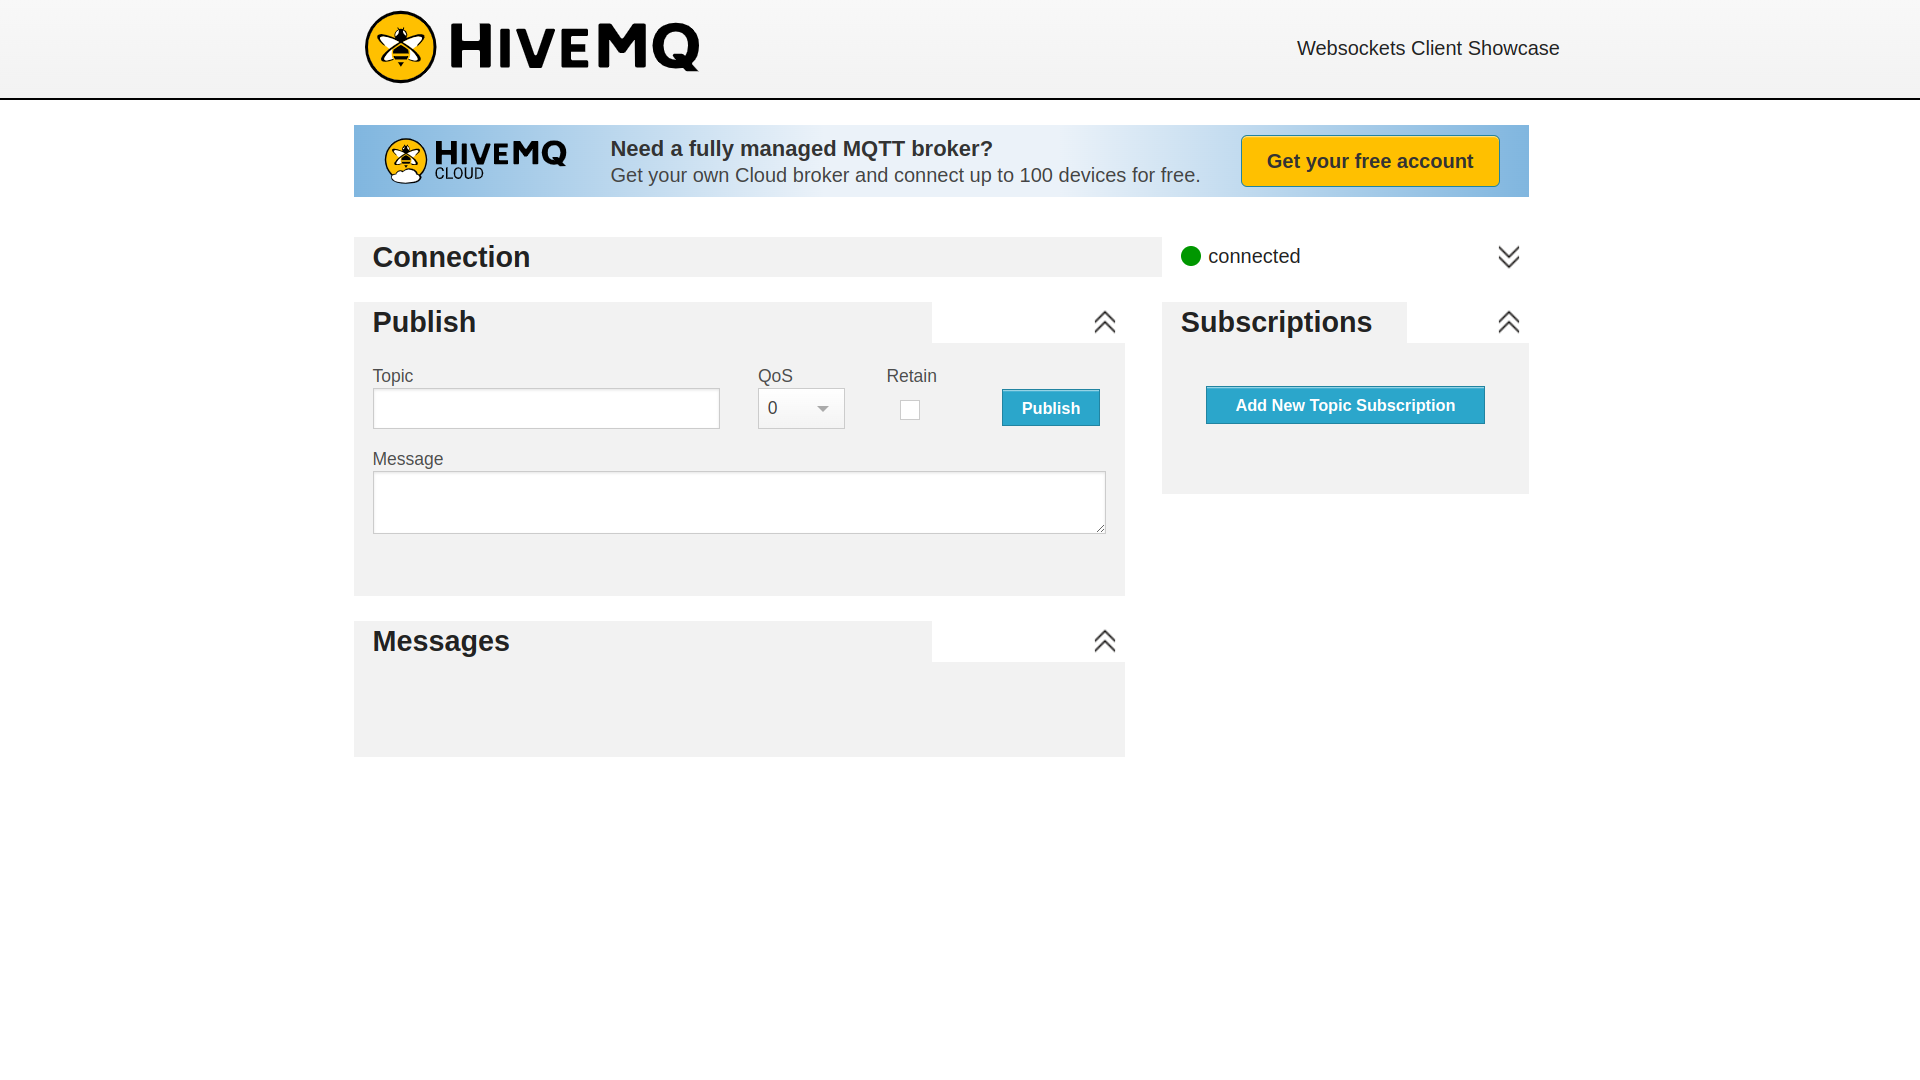
- Click on the Add New Subscription button.
- Fill in the topic
#and click on Subscribe button.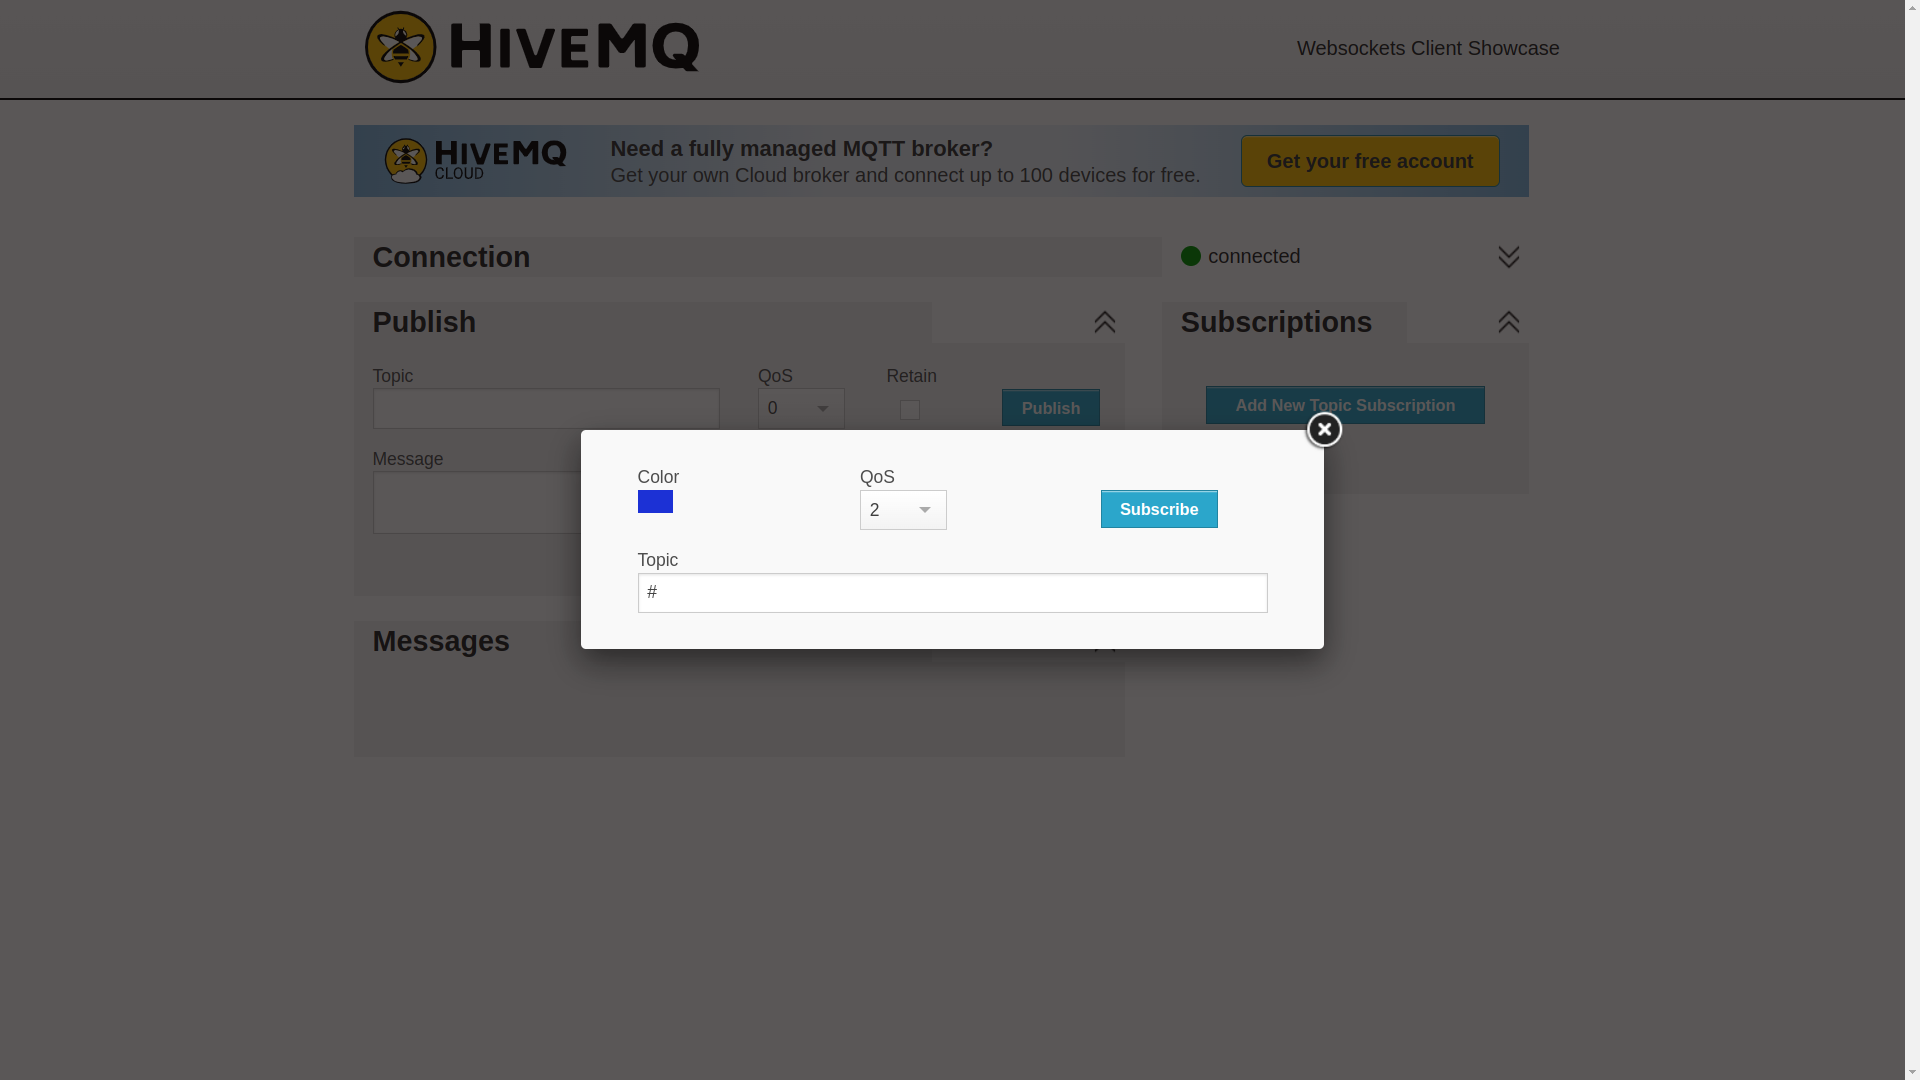
- Fill in the message and topic, then click on Publish button.
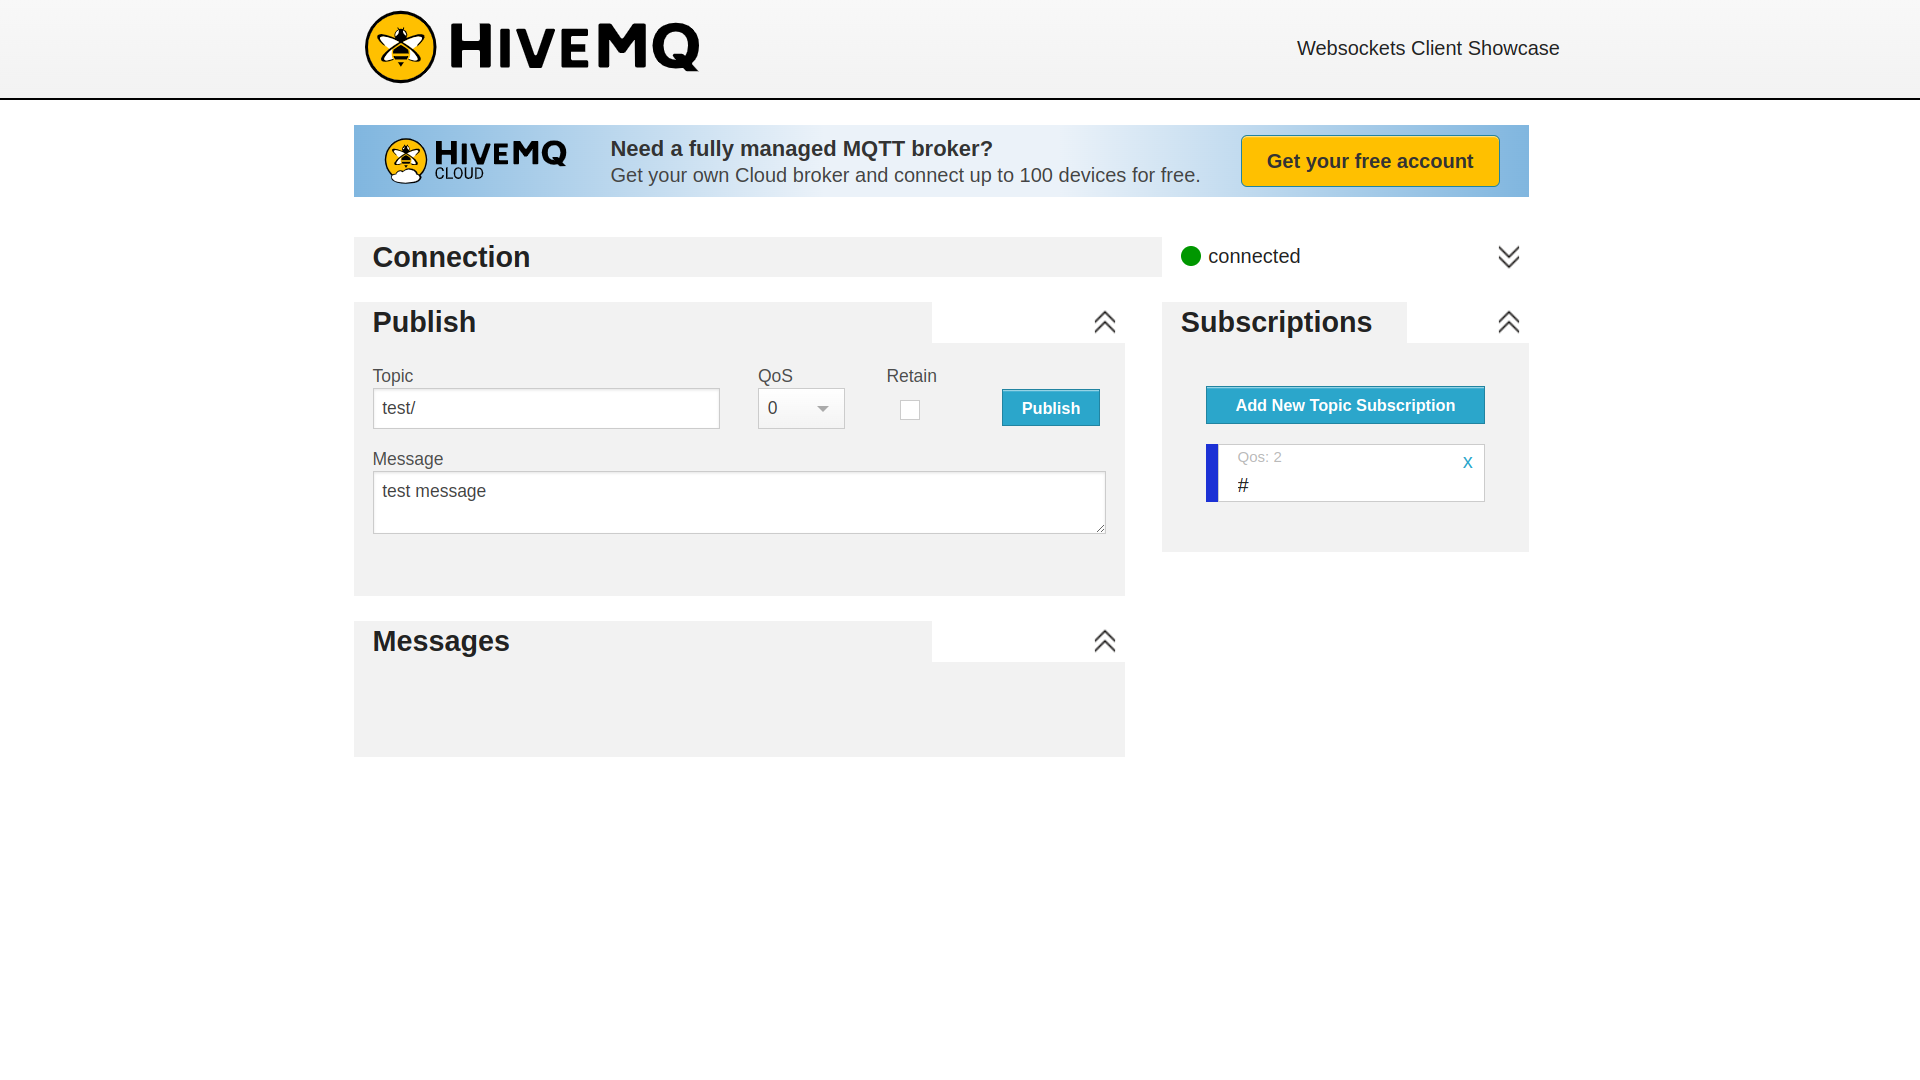
- Send messages should appear in the Messages section.
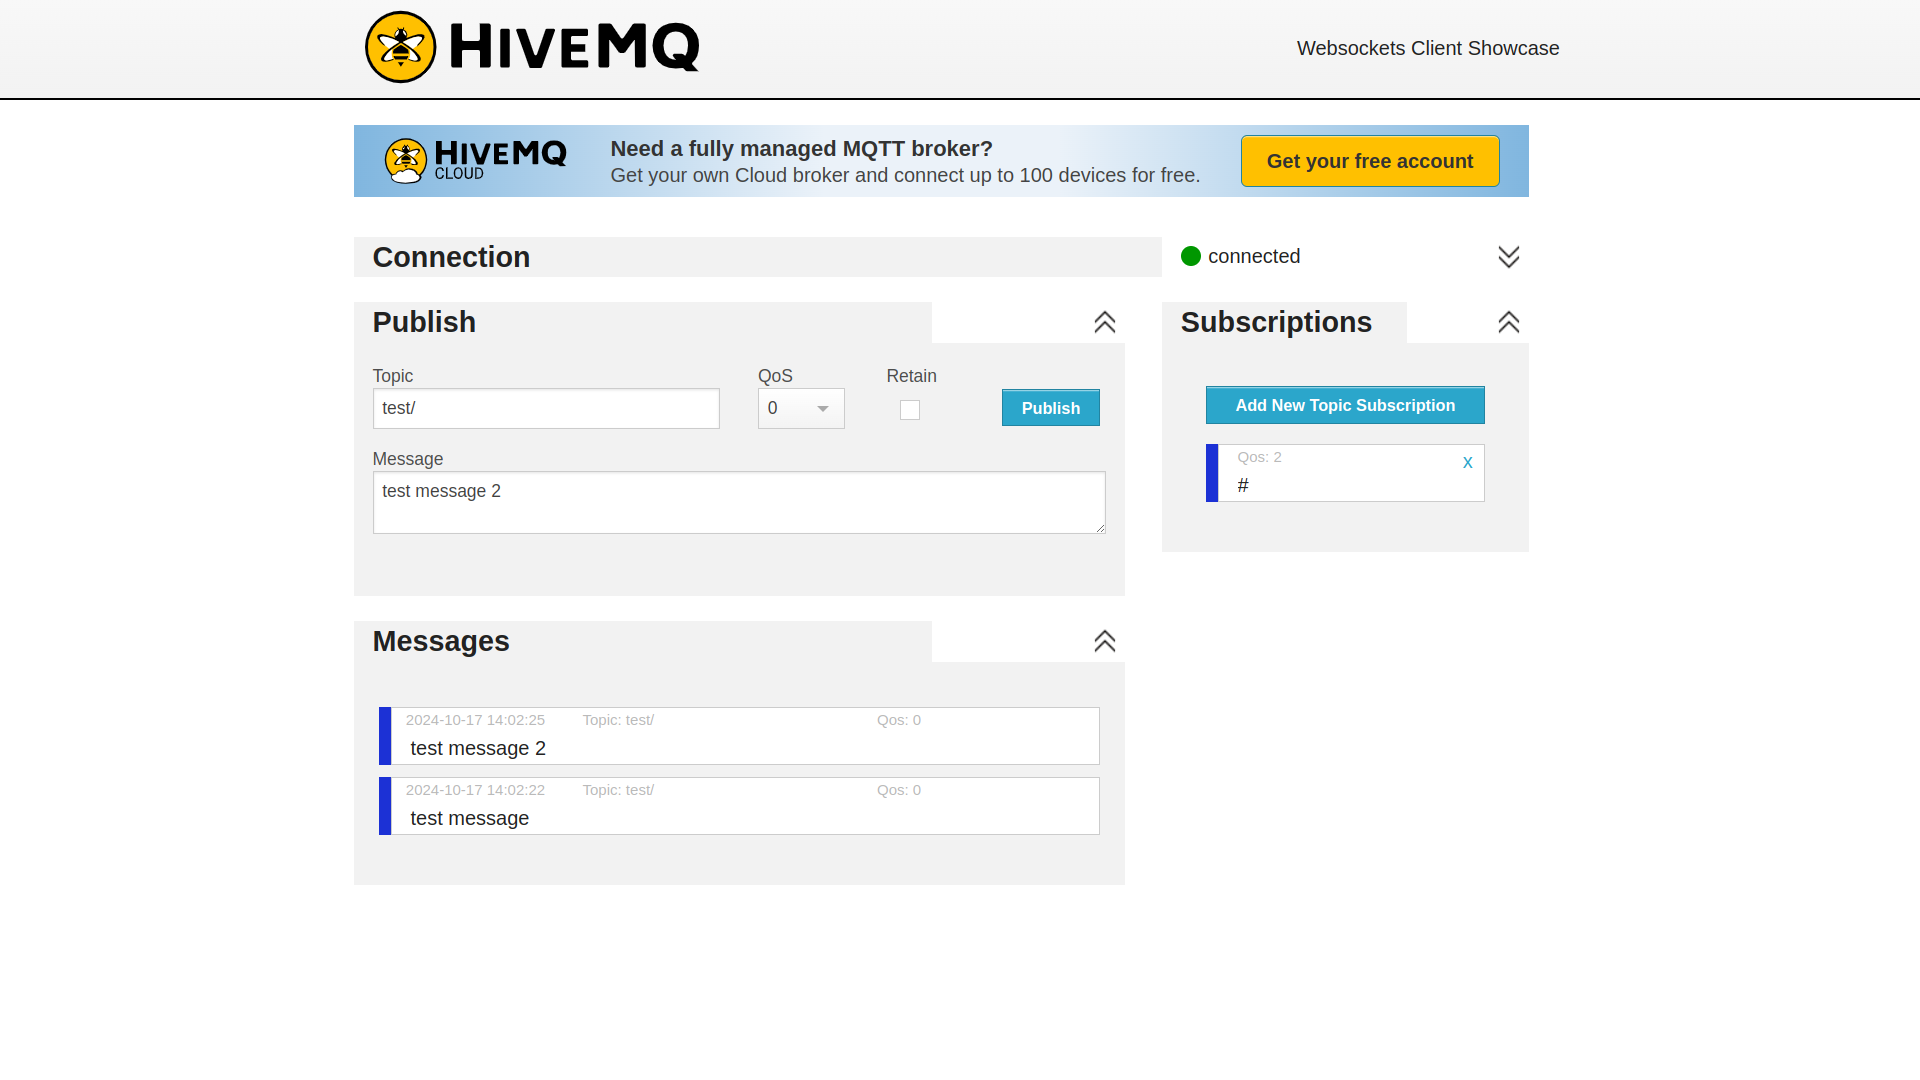
- Navigate to the HiveMQ browser client, fill the host (cluster URL), username and password, then click on Connect button.